Topic

Privacy

A collection of 6 issues
Latest — May 18, 2023

The majority of individuals don’t put much thought into the kind of web browser that they use. Typically, laptops or smartphones are equipped with a default browser like Microsoft Edge or Safari, leading people to assume it's the finest or sole choice available. Nevertheless, there are several other browser options to select from.

Your web browser is the medium through which you communicate with the majority of the internet, resulting in a substantial amount of personal information being managed by it. It is essential to ensure that you are using a secure browser since this data is highly valuable.

So, how much is your data worth? To marketing firms — quite a bit. Companies can sell your browsing data to third parties for profit, and that's just the start of it. Hackers are always on the lookout for people who are not using a secure browser, and exposing personal data in this manner can be incredibly risky.

Your browser and its ability to protect your privacy and security are critical. As a result, let's go through the top five secure browsers for 2023.

Firefox

In 2023, Firefox is considered one of the best web browsers as it is secure, open-source, and offers numerous customization options. Its high level of customization makes it an excellent choice for advanced users, yet it is also user-friendly, making it a great option for non-tech-savvy users.

Firefox blocks third-party tracking cookies automatically, resulting in faster browsing speeds than other browsers that allow websites to track user activity, like Chrome. It also features various security measures, such as anti-phishing and malware protection, minimal data collection, automatic tracker blocking, and encrypted browsing with DNS over HTTPS (DoH). It is also compatible with third-party security extensions.

Firefox's anti-phishing protections are impressive, as it is highly effective in detecting risky and known phishing sites when tested against a database of such sites. Additionally, Firefox's DoH protections encrypt search queries with CloudFlare or NextDNS's encrypted DNS servers, making it challenging for third parties to steal browsing history.

Although many highly secure browsers compromise convenience for protection, Firefox is simple to use and provides advanced security features. Users can adjust security settings, anti-tracker settings, and anti-phishing protections according to their preferences. Firefox is compatible with Windows, macOS, Android, and iOS.

Tor Browser

In terms of user privacy, Tor Browser is the top choice; however, it is not as fast as most of its competitors.

The name "Tor" is derived from "The Onion Routing," a technology that hides the user's IP address by encrypting web traffic and routing it through multiple servers. As a result, before a user's computer can access a website, their traffic must first pass through Tor's secure server network. Tor has been shown to conceal user activity from ISPs, hackers, trackers, and even governments. The NSA was reportedly unable to hack into the Tor network, as stated in Edward Snowden's leaked documents. Tor Browser is banned in certain countries that censor the internet because it provides users with unrestricted access to the web.

Tor's data collection policy is minimally intrusive, as it only collects usage data to assess browser performance. Despite being an advanced browser, Tor Browser's interface is user-friendly, and it uses the same source code as Firefox, with minor variations. Users can even install most Firefox extensions into Tor Browser. However, browser extensions increase the likelihood of machine identification by network surveillance tools, so users who wish to remain as private as possible should avoid using them.

While Tor Browser is highly secure, its onion routing technology will slow down the internet connection, similar to the effect of using a VPN. When users' traffic bounces off multiple servers, their connection speed is adversely affected. Nonetheless, Tor may be the ideal choice for users with a reliable internet connection who is willing to trade some speed for high security. Tor Browser is compatible with Windows, Android, macOS, and Linux.

Brave

Brave is a web browser that offers a fast browsing experience and comes with built-in ad and tracker-blocking features. With its "Shields" feature, Brave can automatically block ads and trackers, which allows it to load websites much faster than other browsers. This feature also provides an added layer of protection by blocking malicious web scripts that may try to infiltrate your device. In addition, Brave automatically sets up HTTPS connections, which use a secure encryption protocol to protect user traffic.

One of Brave's standout features is its ability to use Tor technology in Private Browsing mode, which encrypts your traffic through the Tor network. This ensures that your browsing activity remains hidden not only from other users on your device but also from your ISP and other network spies.

Brave also has a unique ad-buying program called Brave Rewards, which allows users to earn BAT (a type of cryptocurrency) by viewing or clicking on sponsored ads. These BATs can then be transferred to the sites and content creators of your choice. This program offers a great revenue solution for content creators as Brave ads generate revenue without using trackers, selling user data, or pop-ups that interrupt the browsing experience. Brave is available for Windows, Android, iOS, macOS, and Linux.

Google Chrome

The reason why Google Chrome is the most popular browser in the world is that it is compatible with all major platforms and provides users with an excellent interface as well as thousands of useful extensions. Google, with its large number of staff and resources, constantly updates and patches Chrome more quickly than any other browser developer to patch network vulnerabilities, man-in-the-middle attacks, browser glitches, and exploitable security holes.

Chrome's Safe Browsing feature uses Google's extensive database of unsafe sites to flag suspicious web pages, which is updated daily and detects more phishing sites than most other browsers. Additionally, Chrome uses sandboxing to prevent malicious web scripts and invasive trackers from stealing data or hacking devices. Users can choose DNS over HTTPS (DoH) protection in Chrome's settings for added privacy and protection from ISPs, governments, and network-snooping hackers, which is turned on by default in Firefox but only requires a single click in Chrome.

It's important to mention that Chrome's tracker blocking is limited due to Google's reliance on web trackers to gather user data for advertisers. Chrome collects user data by default, and while much of this data is used to enhance Chrome's security, it's also shared within the entire Google ecosystem, including advertisers and potentially even governments. Despite this, Chrome has many trackers and ad-blocking plugins available for security-oriented users, such as Avira Safe Shopping. Although Chrome may be one of the most secure browsers, it's also one of the worst for user privacy. Google Chrome is available for Windows, macOS, Android, iOS, and Linux.

Microsoft Edge

Microsoft Edge is a vast improvement compared to its predecessor, Internet Explorer. Edge is a user-friendly, Chromium-based browser that boasts robust security tools, including Edge SmartScreen anti-phishing technology, which detects phishing sites more effectively than Chrome in tests.

In addition to its security features, Edge also offers a simple tracker-blocking system that has three levels: Basic, Balanced, and Strict. The Strict setting blocks most trackers and cookies, including those necessary for some sites to function. In contrast, the Balanced setting performed best in tests, detecting and blocking the most invasive cookies. This makes it much easier to manage online privacy than in Chrome, where the options are limited to

"Allow All," "Block Third-Party," and "Block All."

Like Chrome and Firefox, Edge now supports DNS over HTTPS by default, which enhances user privacy when browsing the web. Microsoft Edge is available for Windows, macOS, Android, and iOS.

Conclusion

It can be difficult to determine whether a browser is truly secure or not, but the browsers mentioned in this article offer a good level of privacy. While this is a great start, for the most secure browsing experience, I suggest using a combination of a secure browser and a virtual private network (VPN). A VPN adds an extra layer of protection to your online activity by encrypting your entire Internet connection, making it much more difficult for anyone to intercept your data or monitor your browsing habits.

By using a quality VPN, you can also hide your real location and appear to be browsing from a different location altogether. This can be especially useful for accessing content that may be restricted in your country or region. With a secure browser and a VPN, you can enjoy a more private and secure browsing experience, free from the prying eyes of hackers, governments, and other third parties that may be trying to track your online activity.

Best safety browsers in 2023

Apr 13, 2023 — 5 min read

In recent years, the issue of user privacy has become more critical than ever before. With the rise of social media and other online platforms, companies are collecting vast amounts of user data, which can be used for various purposes. While some of these purposes may be benign, such as improving the user experience or providing targeted advertising, others may be more nefarious, such as selling user data to third parties or engaging in targeted surveillance.

There are now many apps that are activated by code words — they are called " marker words". These words can activate the listening function on your gadget covertly and completely invisibly. It can be not only "OK, Google" or "Hi, Siri", but also other completely unrelated words or sounds.

Perhaps you may have noticed Instagram advertising something you recently talked to your friends about even in real-time without holding your phone. If so, you know you're being bugged.

So, who's eavesdropping on us?

Facebook

Facebook reportedly hired hundreds of third-party contractors to transcribe voice messages but stopped the practice in July 2019 after it was made public. The contractors were not always clear on why they were listening to certain conversations and did not understand how the messages were obtained. Facebook did not inform its users about this development, which involved the potential listening of personal voicemails by unauthorized individuals.

Microsoft

Microsoft's employees were reported to have listened to personal audio recordings made through Cortana and Skype Translator services. However, Microsoft did not deny this claim and instead included the information in the company's privacy policy. Microsoft believes in maintaining an honest relationship with its users and believes they have the right to know that their conversations may be overheard. Nonetheless, Microsoft did not previously disclose this information to its users, and it is possible that the company decided to proactively share the information as they had been listening to audio recordings for some time. This is in contrast to other companies that faced privacy violations but did not disclose their actions to their users.

Apple

It has been reported that contractors who test Apple's Siri voice assistant for accuracy may be listening in on users' private conversations. It should be noted that Siri can be activated by more than just the phrase "Hey, Siri" and can be triggered by similar-sounding words, background noise, or hand movements. This has resulted in Siri being inadvertently activated during private conversations, leading to the collection of personal information and recordings of private conversations, including those between doctors during commercial transactions. These recordings are often accompanied by data that can reveal the location or personal contacts of the users. Apple representatives claim to be working to address these concerns in order to protect users' personal information.

Amazon

Over one thousand Amazon contractors are listening to voice recordings made in the homes and offices of Echo voice assistant owners. These contractors are required to sign non-disclosure agreements and are not allowed to discuss the program publicly. They work nine-hour shifts and analyze up to 1,000 sound recordings per shift, but even if they have concerns about what they hear, they are required to adhere to the non-disclosure policy. Amazon claims to take the security and privacy of its customer's personal information seriously, and employees do not have access to information that could identify a person or account directly. It is important to note that users can disable the use of their personal voice records for the development of new features in Amazon's Alexa privacy settings.

Google

Google employs experts to listen to the voice commands given by users to its voice assistant. These recordings are made after the voice assistant has heard the phrase "Ok, Google" and can be made on smartphones using Google Assistant or on the Google Home smart speaker. Google shares snippets of these recordings between users and linguists around the world to improve the voice assistant, but claims to have access to no more than 0.2% of all user commands. The company has prohibited employees from transcribing conversations or other extraneous sounds. However, in June 2019, it was reported that a significant leak of audio recordings of users occurred, with over a thousand recordings, including personal conversations between parents and children, addresses, and work calls being exposed. Some recordings were made accidentally due to the assistant being activated by mistake. Google attributed the leak to the actions of one linguist and claimed to be investigating the matter.

Conclusion

Despite the concerns that these data collection practices raise, companies often argue that they are necessary to improve user experience and provide more personalized services.

However, many users remain skeptical of these claims and are increasingly concerned about the potential for abuse. For example, data breaches can expose user data to hackers and other malicious actors, potentially putting users at risk of identity theft and other forms of cybercrime. Additionally, governments and other organizations may use user data to engage in targeted surveillance, raising concerns about civil liberties and individual privacy.

In response to these concerns, governments and regulatory bodies have taken steps to regulate the collection and use of user data. In the European Union, the General Data Protection Regulations (GDPR) have strengthened data privacy laws and given users greater control over their data. In the United States, the California Consumer Privacy Act (CCPA) has similarly sought to protect user privacy by requiring companies to disclose what data they collect and allowing users to opt out of data sharing.

Despite these efforts, however, the issue of user privacy remains a contentious one. As technology continues to advance, companies will undoubtedly find new ways to collect and utilize user data, raising new concerns about privacy and security. It is therefore crucial that users remain vigilant and informed about the data collection practices of companies they interact with, and for governments and regulatory bodies to continue to monitor and regulate these practices to protect user privacy.

Are companies spying on their users in 2023?

Mar 28, 2023 — 5 min read

People frequently utilize various VPN servers at work. Off-the-shelf options are good, but we've come to learn that a personal VPN offers substantial benefits. To appreciate the benefits of creating your own VPN server over purchasing one, consider why VPNs are used in the first place:

•  To prevent others from intercepting your lines of communication

•  To circumvent access limitations to a specific resource in your own nation or a foreign one

•  Conceal personal information from the Internet provider (the owner of the WI-FI access point)

•  Leave your present location unidentified (don't forget time zones — this is the indicator that may readily pinpoint your location)

Everything is quite straight-forward here, so let's get down to the interesting stuff: what are the advantages of utilizing your own service, and how should you go about establishing one?

Well, today you’re in for a treat — to answer these questions, we’ve put together a checklist with step-by-step instructions for setting up and configuring a VPN server.

Advantages of Using a Personal VPN Server

1. Bypassing blocks

Several countries attempt to fight VPNs by blocking them. But, if you use your own VPN, it will not appear in the main list of providers and will almost surely avoid blocks.

2. There are no captchas

All well-known services will request that you choose horses from a set of photographs, locate traffic lights, or identify a word in a picture. Why is this the case? Several others are using a ready-made VPN server at the same time as we are. Consequently, the website will suspect such traffic and assault you with captchas. When you use your own VPN server, however, this problem is avoided since you will have a unique IP address that will look like an ordinary user.

3. High speed

Off-the-shelf VPN servers often have low bandwidth since they typically don't have time to grow their servers and networks for a big number of customers. With a self-hosted resource, you’ll have all the bandwidth you could possibly need.

4. The ability to send all computer traffic through a VPN, not just browser traffic

5.  No need to install third-party software

As you can see, having your own server solves the majority of the problems associated with using a VPN.

Checklist for creating your own VPN server

Take the example of DigitalOcean and its Droplet server.

Registration

If you already have a DigitalOcean account, you may go to the next stage. If not, you must first register (all the steps are intuitive, don’t worry).

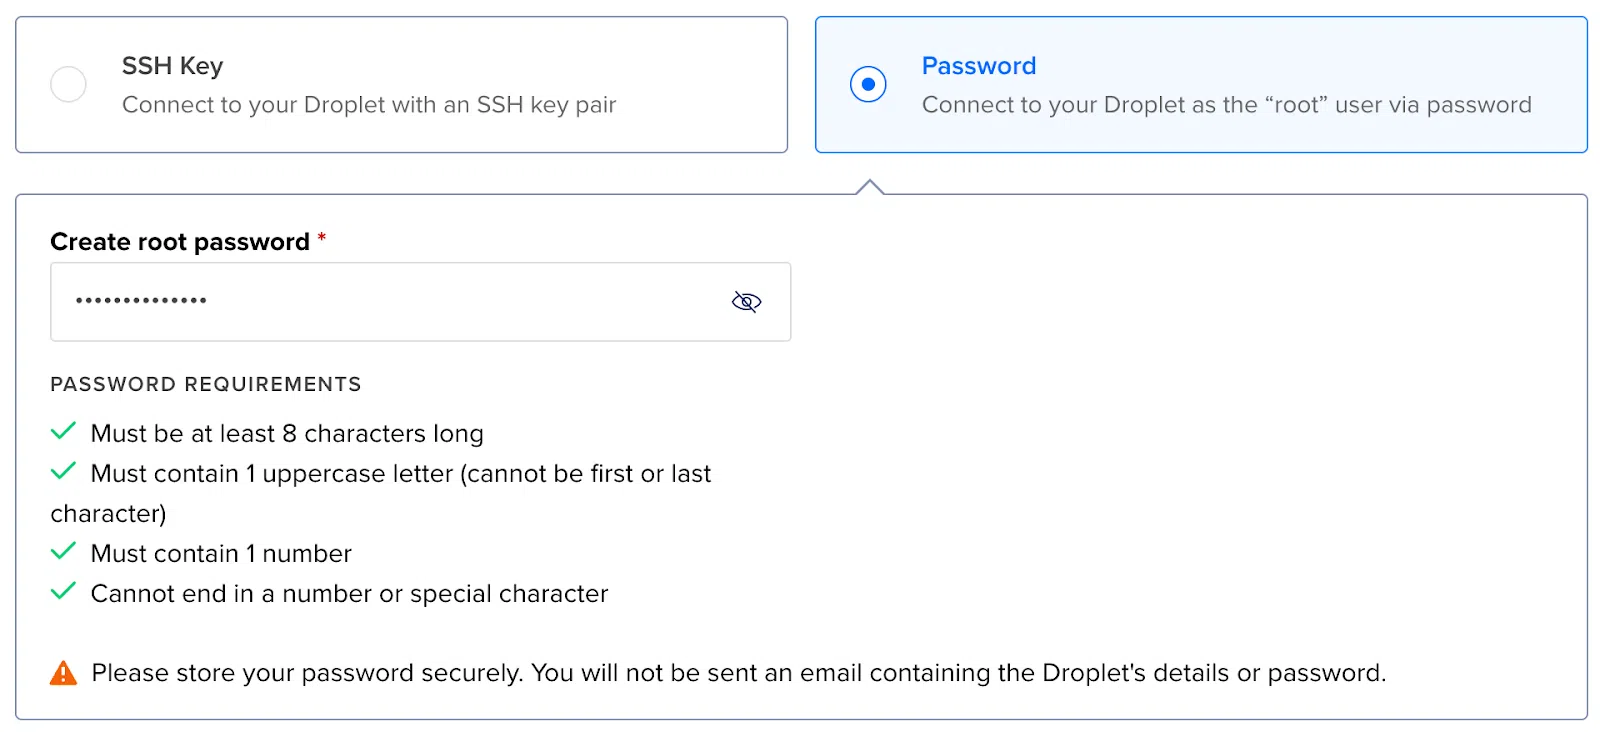
Create a new Droplet that will function as a VPN server

Choose a data center from which you intend to connect to the internet. I selected to work with Frankfurt since it is physically closer to my country of residency, which improves working speed.

Choose Marketplace, and Docker on Ubuntu in the Image column. Finally, in the Size column, choose the subscription plan that suits you.

Next, put a name in Hostname, such as ‘vpn-server’. This has no effect and is simply for your convenience. Next, click the Create Droplet button.

Wait for the server to be created. This might take up to a minute. Following that, you will be given your server's IP address.

Connect to the SSH server

Launch Terminal on MacOS/Linux (or PowerShell/putty on Windows) and connect to our server through SSH using the root username and the IP address of our server.

This can be done with the help of:

ssh root@{your-ip-address}

> enter your password

After that, you have to connect.

Create a docker-compose.yml file

Just copy the code from this website and paste it into your file. This is your server configuration file.

You may create a file directly over SSH using console text editors (nano/vim) or with an SFTP client. I used SSH to access the console editor.

In the same SSH window, input the following:

> nano docker-compose.yml

Paste the content. In the added text, change the following parameters for yourself:

•  my-shared-secret — your secret word

•  my-username — your personal login

•  my-password — your password

Take note of how straightforward it is — there are just 14 lines in the file that we want.

Exit by pressing Ctrl+X, then Y, and then press Enter.

Run the container with the recently created server

Use the same SSH window in which we just created the file.

> docker compose up -d

Congratulations! Your VPN server is up and running. So, how do you connect it?

Connect to the created VPN server

We recommend using IPsec because the clients for this VPN are already built into MacOS/Windows and you don't have to install anything locally. You just need to create a new VPN connection with the following parameters:

•  Type: IPSec

•  Server address: enter the IP address of the server

•  Account name: write my-username (or the one you changed it to)

•  Password: add my-password (or the one you changed it to)

•  Shared Secret: write my-shared-secret (or the variant you changed earlier)

For MacOS, you don't need to install anything, just configure it like this:

For Windows, these settings will look a little different:

Unfortunately, Windows is not so simple and you will have to surf the registry and allow NAT-T.

For Linux users, there is also a screenshot with the required settings (I used them in Ubuntu 22.04):

Before setting up, you need to install the network-manager-l2tp-gnome package. This is done through the console:

> sudo apt-get install network-manager-l2tp-gnome

You can also connect from your phone, you don't need to install anything else. The settings on the iPhone look like this:

And that’s it — you're done! Connect and check the IP address, for example, on Whoer via the link. Now, for the whole Internet, you are physically located in the region where you created your VPN server, and the IP is the IP of the server. It's not as scary, time-consuming, or expensive as you might think.

Security recommendations

When it comes to the security of your server, I would, as a final thought, recommend:

•  Using an SSH key instead of a password

•  Changing the SSH-port from 22 to any other

•  Using a complex password and Shared-secret (preferably a randomly generated string)

How to create your very own VPN server

Feb 22, 2023 — 4 min read

When most individuals hear the phrase "data disposal," they get terrified. The deletion of data on one's computer or mobile device is the last thing most people desire. But, whether you are the owner of a large, medium, or small corporation, or simply a regular user, you will need to delete or replace your obsolete media at some point. After all, you must guarantee that any data contained in this medium is erased and cannot be recovered.

Nobody wants the next owner of their outdated equipment to discover their secrets, which might have serious legal or competitive consequences.

However, few people understand how to properly erase data such that it cannot be retrieved by others.

What are the different forms of data disposal?

Fortunately, there are various methods for disposing of data. Unfortunately, none of these strategies are ideal, nor can they guarantee total success. However, understanding the strategies available can assist you in selecting the one that is best for you or your business.

Delete / Reformatting

As previously stated, removing a file from an electronic device removes it from a file folder but does not delete the contents. The data is saved on the device's hard drive or memory chip.

The same holds true when you attempt to erase data by reformatting the disc. This also does not erase the data. It simply substitutes a new file system for the existing one. It's like ripping out the table of contents from an old cookbook when you really want to get rid of the cookbook itself. There are several programs available on the internet that allow nearly anybody to recover data from a drive that has just been reformatted.

Using approaches like these is a poor, uninspired, and ineffective manner of attempting data disposal.

Wiping

Data wiping is the process of erasing data from an electronic medium so that it can no longer be read. Typically, data wiping is achieved by physically attaching any media to bulk wiping equipment. It may also be done internally by booting a PC from a network or a CD. It is a procedure that allows you to reuse any medium that has been erased in this manner without losing storage capacity.

Wiping data can take a long time, sometimes even an entire day for just one device. Data wiping may be valuable for an individual, but it is impracticable for a company owner who has to clean several devices.

Overwriting data

In a way, overwriting data is similar to wiping data. A series of ones and zeros are written over existing data when it is rewritten on an electrical device. Set patterns may also be employed; the pattern does not have to be random. Most of the time, one overwriting is sufficient to complete the operation. But numerous passes can be necessary if the medium has a high level of security. This makes sure that no bit shadows can be seen and that all data is entirely deleted.

A bit shadow is a piece of erased information that may still be seen under an electron microscope. It resembles writing a note on a notepad. They can take off the top sheet of paper, but what they wrote could still be legible on the page immediately below. High-security organizations are still concerned about bit-shadowing, but low-risk companies certainly don't need to worry too much. Using an electron microscope to recover data is time- and money-consuming.

Perhaps the most typical method of data destruction is overwriting. It can be time-consuming and is only effective if the media being rewritten is undamaged and still capable of receiving data writes. Additionally, it provides no security protection when overwriting. Any hard disk with complex storage management components does not support overwriting. For each piece of media that is being overwritten, you might need a license if you are overwriting a device because of legal obligations.

Erasure

Erasure is another term for overwriting. Erasure should be comprehensive, destroying all data on a hard drive, and delivering a certificate of destruction demonstrating that data on an electronic device has been effectively wiped. Erasure is a terrific concept for enterprises that have acquired off-lease equipment, such as PCs, enterprise data centers, and laptops, or if you want to reuse or redeploy hard drives for storage of new contents.

Degaussing

Degaussing destroys computer data by disrupting the magnetic field of an electronic media with a high-powered magnet. The data is destroyed when the magnetic field is disrupted. Degaussing may swiftly and effectively erase data in a device containing a huge quantity of information or sensitive data.

However, it has two big drawbacks.

When you degauss an electrical device, its hard drive becomes unusable. Degaussing damages the hard drive's connecting circuitry. If you wish to reuse an electrical digital device such as a laptop, computer, or mobile phone, this is not the way to go about it.

Another issue is that there is no means of knowing if all of the data has been erased. You can't tell if all the data has been lost if you make the hard disk useless. In this instance, the only way to verify data destruction is to utilize an electron microscope. However, unless you are destroying high-security information, this method of verifying is both costly and unworkable.

The density of a hard disk can also affect degaussing. As technology advances and hard drives get larger and more powerful, degaussing may no longer be as effective as it once was.

Physical destruction

Many people want to recycle their old equipment but are hesitant because of the information it may hold. These folks frequently take out the hard disk with a hammer and crush it to pieces.

Surprisingly, physical destruction is also a cost-effective method for organizations and corporations of all kinds to remove data. One of the most advantageous aspects of physical destruction is that it provides an organization with the highest possibility that data has been physically deleted.

However, it may be costly, and because it entails the destruction of electronic media, the capital cost is also considerable. It might also be a concern if an organization has a green and sustainable recycling program for obsolete electronic media.

Physical destruction is a type of degaussing. Incineration is another option, although it is less prevalent since it needs destruction to take place away from human areas.

Conclusion

Properly disposing of sensitive information is an essential component of information security. By taking the time to identify what data needs to be disposed of, selecting the right methods for disposal, and having a secure and controlled plan in place, organizations can ensure that sensitive information is protected and kept out of the wrong hands.

How to properly dispose of sensitive information

Aug 15, 2022 — 5 min read

With iCloud, you can recover data from any iOS device in just seven steps.

Although Apple products are known for their high performance and durability, problems with your iPhone, iPad, or Apple Watch can arise at any time. Fortunately, backing up Apple devices to iCloud is simple. However, just like with the best data recovery tools, you'll need to know how to restore a backup from iCloud in case something goes wrong.

We have thus provided these seven simple steps to help you reset your iOS device using an iCloud backup. Although iCloud is one of the better cloud storage options as one can open it in a new tab, it has one significant drawback: you must wipe your device completely before uploading a backup. If you require a fix for this problem, skip to step 7 of this article.

How to restore an iCloud backup: Setting up

Before restoring a device, you must configure iCloud's backup feature because there won't be anything to restore otherwise.

You must configure the iCloud backup before you may restore your iOS device from a backup. The best time to do this is when you first set up your device, but you can do it whenever you choose.

Go to the Settings app and tap on your name at the top to get started. Then, select "iCloud" and then "Backup" from the list. Ensure that "Backup" is turned on. iCloud will automatically back up your data when your device is locked, plugged in, and connected to WiFi after backup has been enabled.

To manually initiate an iCloud backup, go to Settings > iCloud > Backup and press "Back Up Now." Your Apple device can always be reset to the most recent iCloud backup if you encounter a technical problem or need to recover lost data.

Remember that the complimentary iCloud account that comes with your Apple ID only offers 5GB of storage space. The majority of Apple’s products have much more internal capacity than that. For instance, the iPhone 13 has at least 128GB of internal storage.

Consider eliminating any unnecessary files or upgrading to iCloud+, which starts at $0.99 per month for 50GB of storage, if you try to backup your smartphone to iCloud and discover that your iCloud storage is full.

Step 1: Get ready for a factory reset on your device

You must carry out a factory reset prior to restoring your device from a backup using the standard Apple procedure. This implies that you must delete all of the content that is currently on your device. You can work around this by utilising third-party software if you don't want to perform a reset. To learn how to restore from a backup using third-party software, skip to step 7.

Examine your notes, files, images, and any other apps you think may contain crucial information. After you complete the reset, anything that was added since your most recent backup will be irretrievably gone.

Step 1b (Optional): Disconnect your gadget (Apple Watch only)

Resetting an Apple Watch entails an extra step.

You must unpair your Apple Watch from your iPhone as a separate step before moving on to step 2 if you're resetting an Apple Watch.

Open the Apple Watch app on your iPhone and go to My Watch > All Watches to get started. To unpair an Apple Watch, tap the details button next to the watch you wish to do so. The system will prompt you to decide whether to keep or cancel your mobile plan. Keep it, because you will soon restore it from a backup.

Before continuing to the next step, tap once more to confirm, then enter your Apple ID password to finish the unpairing procedure.

Step 2: Reset your device

Go to Settings > General > Transfer or Reset [Device] once you are certain that nothing crucial will be lost. To start the factory reset, tap "Erase All Content and Settings" after that. You will now be required to enter your Apple ID password or device passcode.

Wait for the reset to finish after entering the passcode. Depending on how much stuff is already on your device, this can take a while. When you see the ‘Hello’ screen from when you first set up your iOS device, you will know the reset was completed.

Step 3: Configure and turn on your gadget

After a reset, you'll need to perform an initial installation once more.

You will need to go through the basic setup procedures the same way you did when you originally acquired your device because your iOS installation is now essentially brand new. Tap the ‘Hello’ screen to get started, then select your language.

To configure your device and connect it to the internet via WiFi or cellular data, simply follow the onscreen instructions. Set up your passcode, Face ID, and Touch ID lastly. Not all Apple devices will have all of these functions, so keep that in mind. You are currently prepared to restore your iCloud backup.

Step 4: Restore iCloud

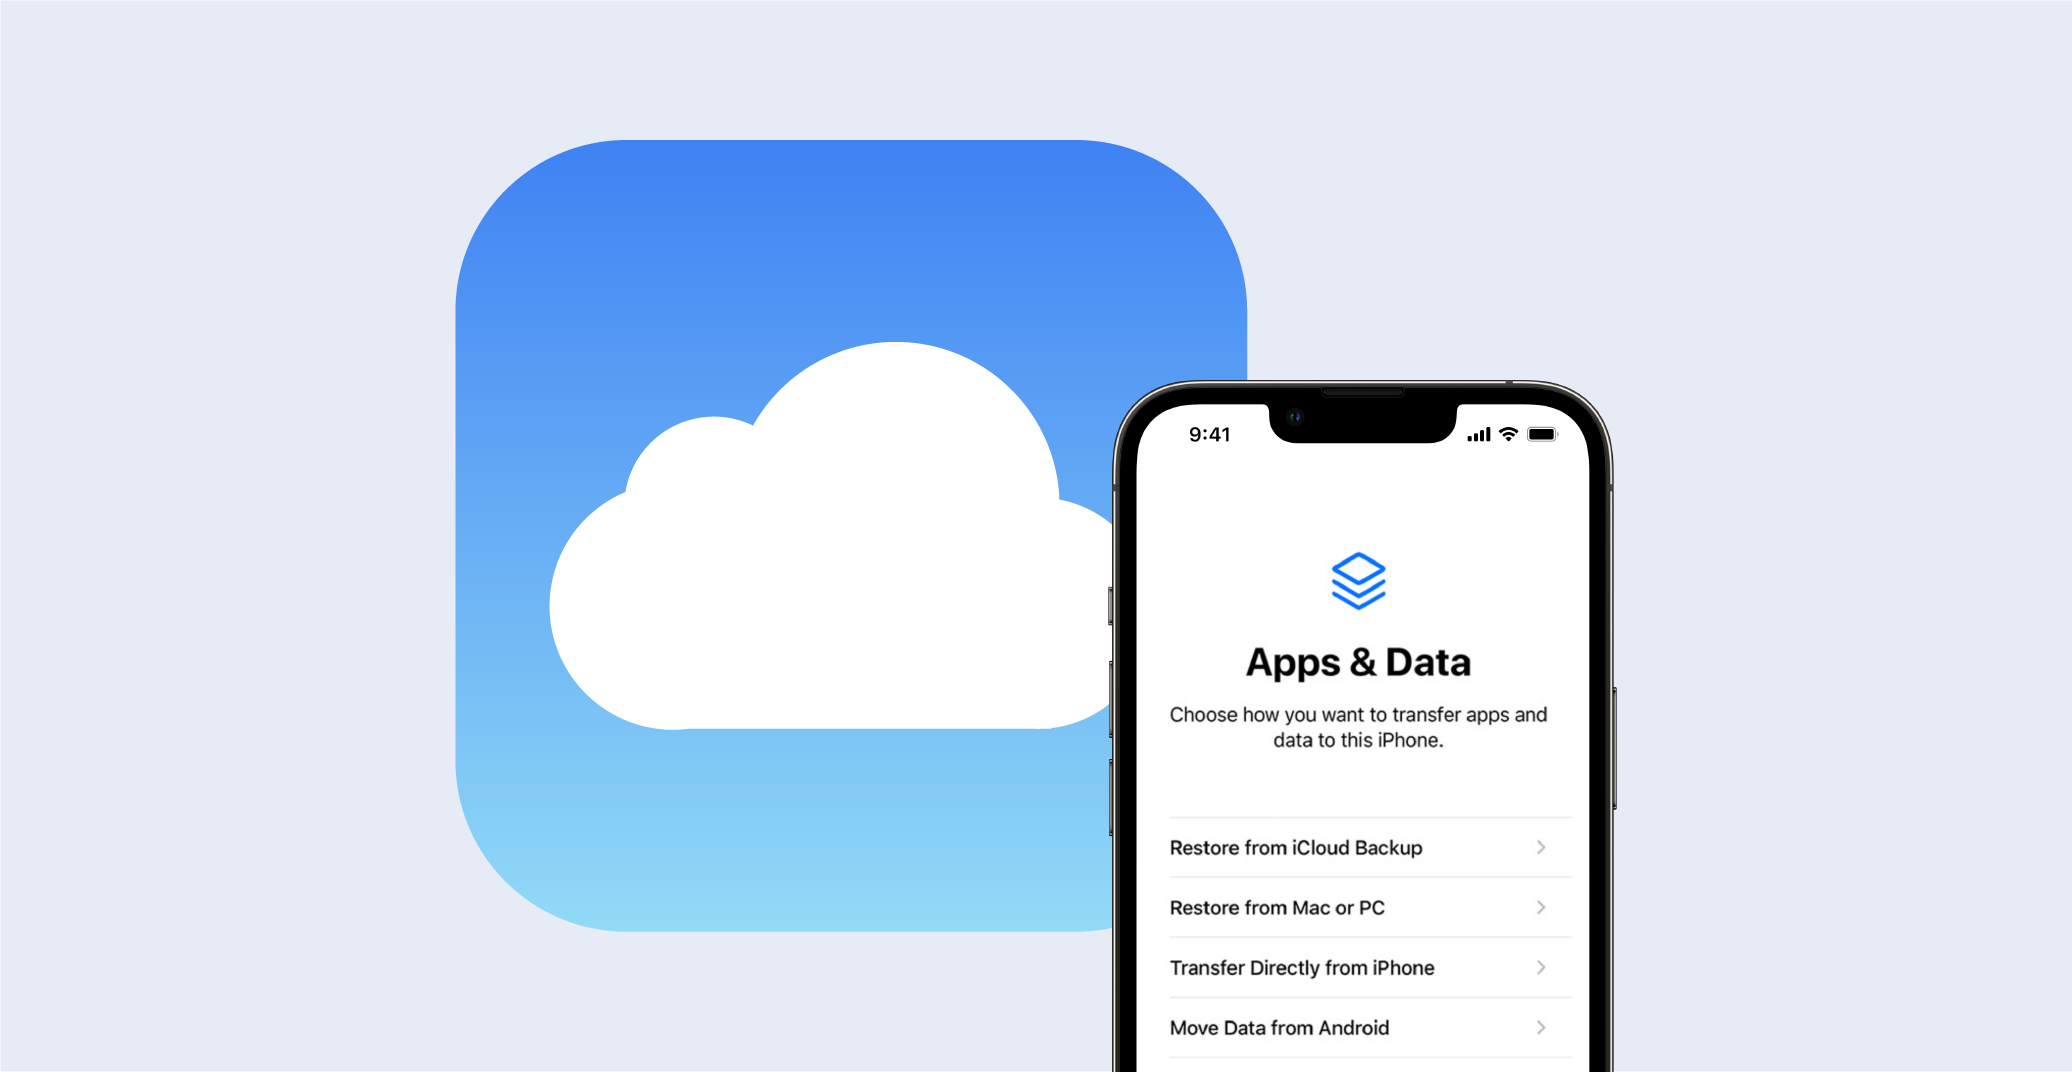
You will have a number of options to restore your data on the following screen. "Restore from iCloud Backup" is the first choice; tap it. iCloud will now ask you to log in with your Apple ID.

You will get a list of available backups after logging in. Unless you want to backdate your device to a certain day and time, pick the most recent. iOS might be telling you that you need to execute an upgrade right now. If this happens, let the update finish installing before trying to restore your device.

Your files, notes, and photographs will all be restored at this time. Restoring your apps is the subsequent step.

Step 5: Restore your apps

Once you're logged in, restoring previously purchased apps is simple:

Log in with your Apple ID to recover apps that have been purchased. While your device downloads all of the apps linked to that ID, stay connected to WiFi. If you have several Apple IDs, sign into each one separately and wait for the corresponding apps to download.

Depending on how many apps you have, this stage may take some time, so be prepared to wait.

Step 6: Finish the setup procedure

There are a few last-minute adjustments to do before your device is ready for use, once you have finished restoring your data and applications. To continue configuring your iOS device, follow the on-screen instructions.

You will be prompted to choose whether you want iOS upgrades to launch automatically or manually as well as if you want to share data with Apple for development purposes.

Additionally, you'll be prompted to configure default features like Screen Time, Apple Pay, and Siri. Once you've finished, a big congratulations is in order! Your iOS device has been fully restored from an iCloud backup.

Step 7 (Optional): Restore your smartphone using third-party software without performing a reset

Using an iCloud backup to restore your iOS device can be a laborious and time-consuming operation. It can take hours to perform a factory reset, download the backup, download your apps again, and, possibly, re-update iOS.

Going through the entire reset and restore process can be a major inconvenience if you just lost a tiny amount of data, such as a single image or a few texts. Fortunately, certain third-party applications, like EaseUS and MobiMover, let you selectively restore a small amount of data from an iCloud backup file without performing a complete reset.

Download the reset program of your choice to get started. Keep in mind that the majority of third-party reset software is not free, but it does provide a free trial that allows only you to download a certain amount of data. If this is an isolated incident, you can recover a few files using the trial at no cost.

How to recover an iCloud backup: Synopsis

You now understand how to backup an iOS device to iCloud and restore your device using that backup. One of the numerous advantages of this robust cloud storage service is the ability to use iCloud to backup your gadgets.

How to recover an iCloud backup

Mar 9, 2022 — 4 min read

Why do you actually need a VPN?

Virtual Private Networks (VPNs) encrypt your data and hide your online activity from third parties, allowing you to surf the web anonymously.

Web servers collect information about your computer's IP address and other information about your browsing history when you visit a website that is hosted on their servers. Your data is scrambled and far more difficult for third parties to monitor when you use a VPN that first connects to a private server.

Consumer VPNs are mostly used for anonymous web surfing. Some people can also use a VPN at home to connect to computers and files on your local network from a different place.

What are the possibilities of using a VPN?

Because a VPN alters your Internet Protocol (IP) address, it may perform a wide range of functions. When a computer is linked to the internet, it has a unique IP address that notifies other computers where it is situated. When you use a VPN, you first connect to a remote computer (a server) to fool other computers into thinking you're in a different place. When using a virtual private network, it is possible to choose a fake location for yourself.

PrivacyJournal offers reviews of the best VPN providers out there.

There are many options available to you when you get a new IP address. The material available on streaming services like Spotify and Netflix, for example, can change. Using a VPN allows you to access streaming libraries in other countries.

A VPN may also be used to circumvent censorship. A practice known as geo-blocking may be used by certain government agencies to ban websites and services in certain regions or territories. Through the use of a VPN, you may cultivate the illusion that you’re in a different place, masking your real IP address and as a result, accessing restricted media.

In terms of the ‘dark side’, individuals use VPNs to download copyrighted material and engage in other illicit actions online as there is an obfuscation of responsibility.

Does a VPN provide ultimate privacy?

Encryption is a crucial component of a VPN. All you need to know about encryption is that it scrambles your data so that only the right key can decode it. We'll go into more detail about encryption in the following section. To put it another way, it's a deadbolt lock for your computer's hard drive.

Before it reaches the internet, all of your data travels via an encrypted tunnel, where it is inaccessible to everyone else. As a result, when you visit a website, your browser does not transmit any information along with it. Browsers carry a lot of data, like your time zone, language, operating system, and even your screen resolution.

Although none of this data directly identifies you, the full collection is likely unique to you and may be used to identify you via a technique known as browser fingerprinting. Government authorities, marketers and hackers may use this information against you.

A VPN conceals all of your browser information, as well as your browsing history. While you’re connected, no one, even your internet service provider, can tell what you’re doing online.

A VPN isn’t a one-stop-shop for internet privacy, however. Anything you do while connected to the internet is fair game, including websites you log into and services you utilize. Many browsers utilize an account to move information like your browsing history and cookies between devices. This data isn’t safeguarded by your VPN tunnel, either.

How does it work?

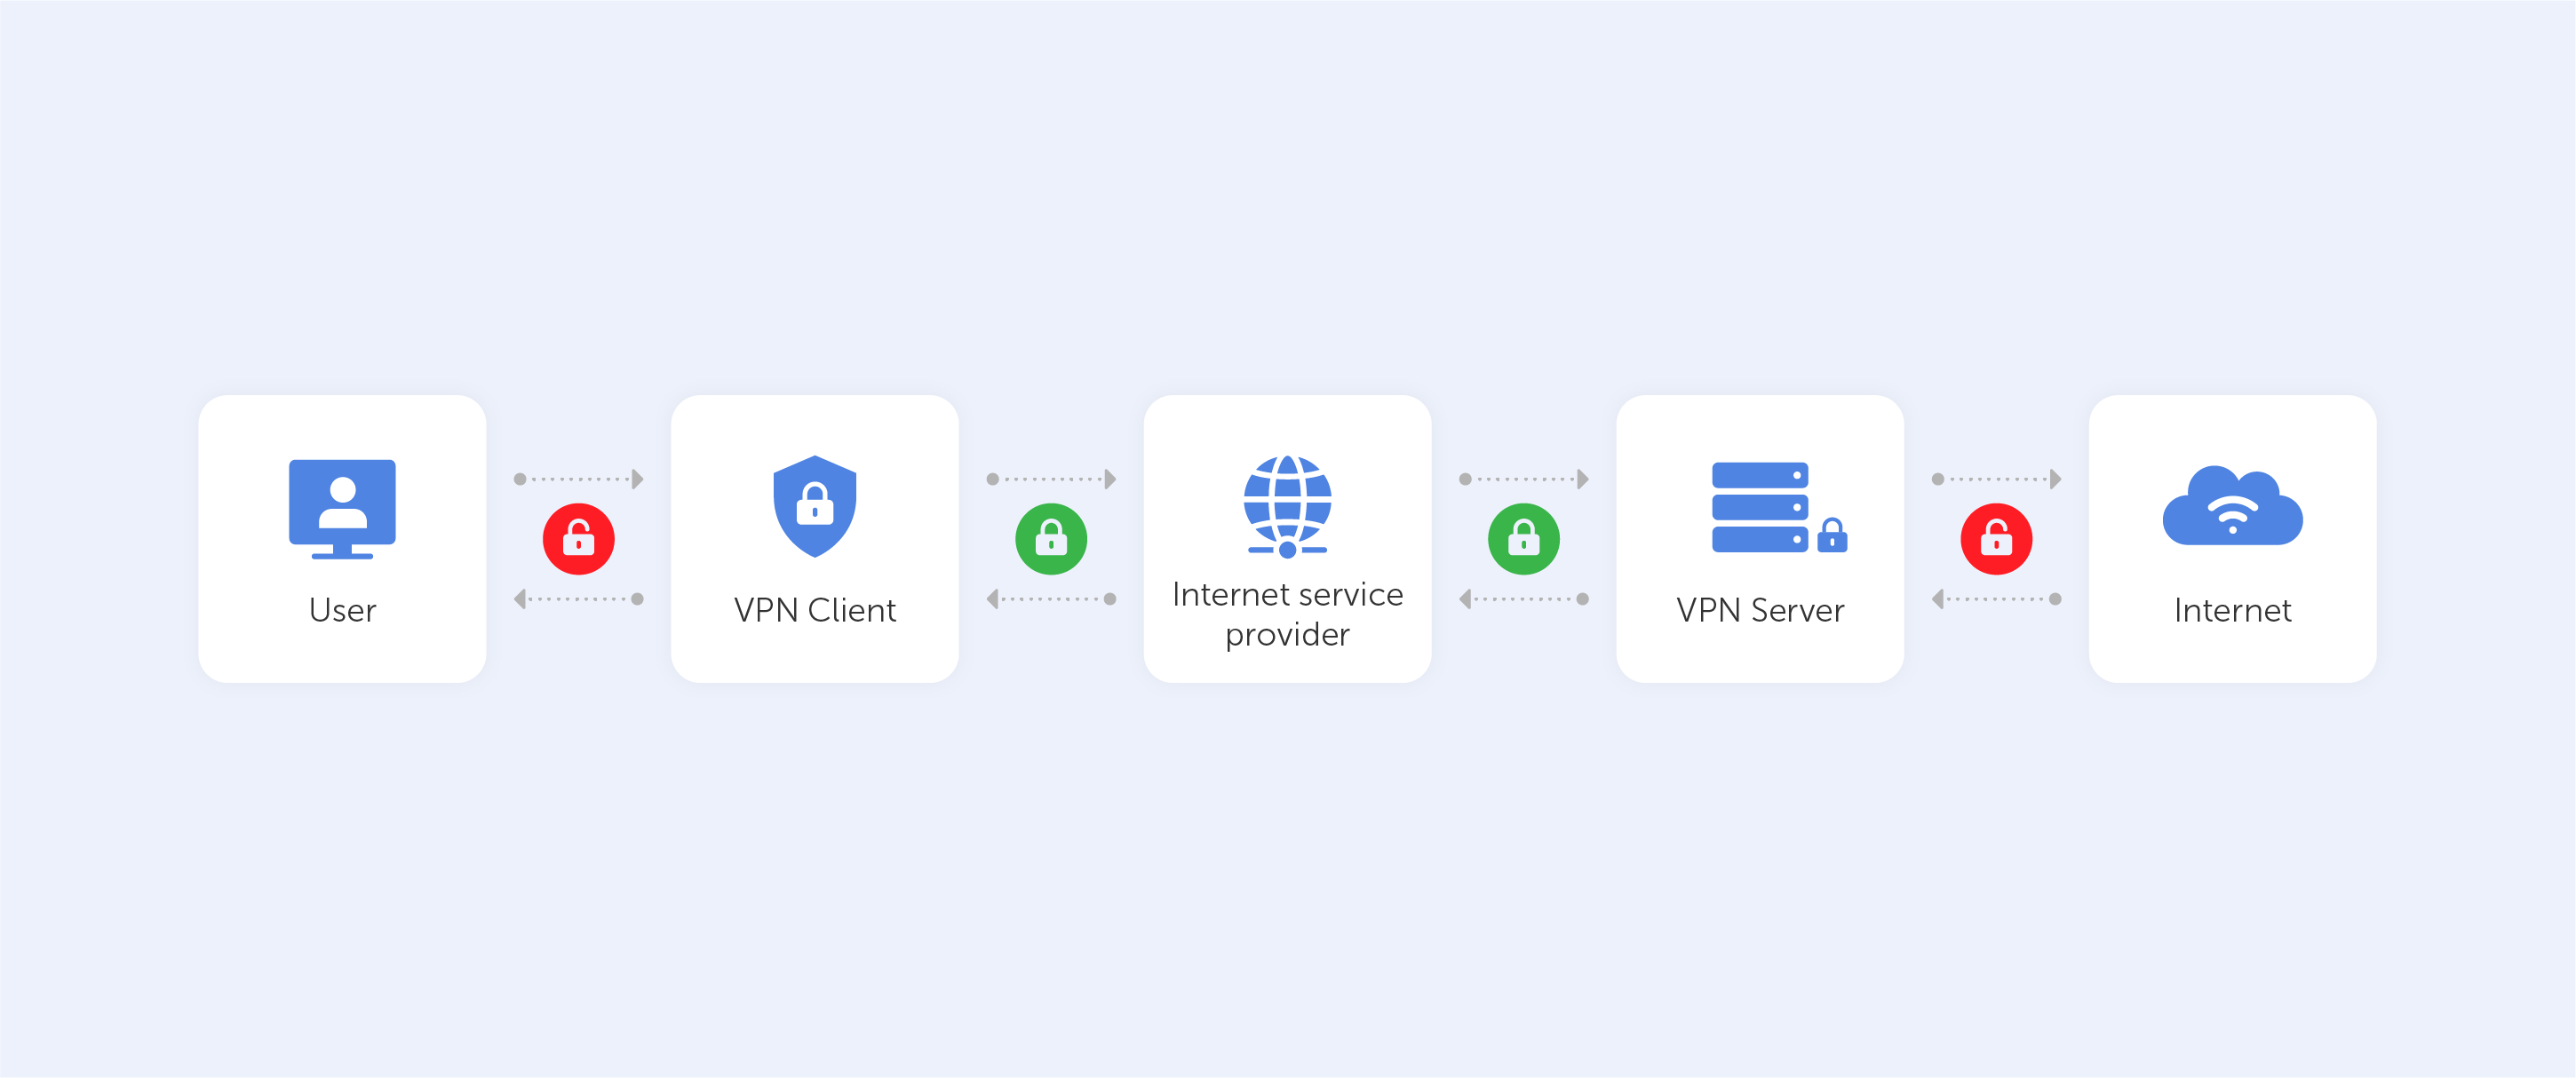
VPNs provide an additional layer of protection for your online activity. As previously stated, using a private VPN server enables you to mask your IP address and make it look as if you're connected to the open internet via a different location.

All of this is possible because of VPN protocols, which are used by VPN service providers. VPN protocols are simply a set of instructions for your computer to follow while connecting to a server. The protocol also specifies encryption requirements in addition to a ‘how to’ of setting up and managing your connection.

Encryption is a major reason to use a VPN. All but a small percentage of web surfing now takes place in a secure environment. Despite the fact that you're using an encrypted connection, your personal information is still being sent.

Think of your internet connection as a passageway through which you move information. In order to keep your online activities private, this tunnel is protected by a layer of encryption. Whenever you connect to your Twitter account, for example, you're doing it over a secure tunnel that only you and Twitter can see.

As with a VPN, this is the case. Instead of directly connecting to the internet, your data is routed via a VPN server, where it is encrypted and rendered anonymous. The AES cipher with a 256-bit key is used by most VPN services. AES is a widely used block cipher for encrypting and decrypting data.

By establishing an encrypted connection, the VPN server verifies that you are indeed connected to a certain private network. Data and browser history are then shielded from prying eyes outside the tunnel and never leave it.

To summarize, a VPN creates an encrypted path for your data to travel through on its way to and from the VPN server. In most cases, there’s no way for anybody to know who you are or where you’re from when connected to a VPN server.

Is it a panacea?

When it comes to the effectiveness of VPNs, there's no secret sauce. A renowned VPN service like NordVPN or TorGuard is all you need to ensure that your VPN works. Individual product evaluations are of course necessary.

There's a short test you can do to determine whether your VPN connection is functioning. For free, ipleak.org and ipleak.net provide tools for checking your IP address, DNS queries, and WebRTC data (basically, everything a VPN should, in theory, obfuscate). Verify that the information is different when your VPN is active. As long as it is, your VPN is running as it should.

What is a VPN?