How to create your very own VPN server

People frequently utilize various VPN servers at work. Off-the-shelf options are good, but we've come to learn that a personal VPN offers substantial benefits. To appreciate the benefits of creating your own VPN server over purchasing one, consider why VPNs are used in the first place:
• To prevent others from intercepting your lines of communication
• To circumvent access limitations to a specific resource in your own nation or a foreign one
• Conceal personal information from the Internet provider (the owner of the WI-FI access point)
• Leave your present location unidentified (don't forget time zones — this is the indicator that may readily pinpoint your location)
Everything is quite straight-forward here, so let's get down to the interesting stuff: what are the advantages of utilizing your own service, and how should you go about establishing one?
Well, today you’re in for a treat — to answer these questions, we’ve put together a checklist with step-by-step instructions for setting up and configuring a VPN server.
Advantages of Using a Personal VPN Server
1. Bypassing blocks
Several countries attempt to fight VPNs by blocking them. But, if you use your own VPN, it will not appear in the main list of providers and will almost surely avoid blocks.
2. There are no captchas
All well-known services will request that you choose horses from a set of photographs, locate traffic lights, or identify a word in a picture. Why is this the case? Several others are using a ready-made VPN server at the same time as we are. Consequently, the website will suspect such traffic and assault you with captchas. When you use your own VPN server, however, this problem is avoided since you will have a unique IP address that will look like an ordinary user.
3. High speed
Off-the-shelf VPN servers often have low bandwidth since they typically don't have time to grow their servers and networks for a big number of customers. With a self-hosted resource, you’ll have all the bandwidth you could possibly need.
4. The ability to send all computer traffic through a VPN, not just browser traffic
5. No need to install third-party software
As you can see, having your own server solves the majority of the problems associated with using a VPN.
Checklist for creating your own VPN server
Take the example of DigitalOcean and its Droplet server.
Registration
If you already have a DigitalOcean account, you may go to the next stage. If not, you must first register (all the steps are intuitive, don’t worry).
Create a new Droplet that will function as a VPN server
Choose a data center from which you intend to connect to the internet. I selected to work with Frankfurt since it is physically closer to my country of residency, which improves working speed.

Choose Marketplace, and Docker on Ubuntu in the Image column. Finally, in the Size column, choose the subscription plan that suits you.

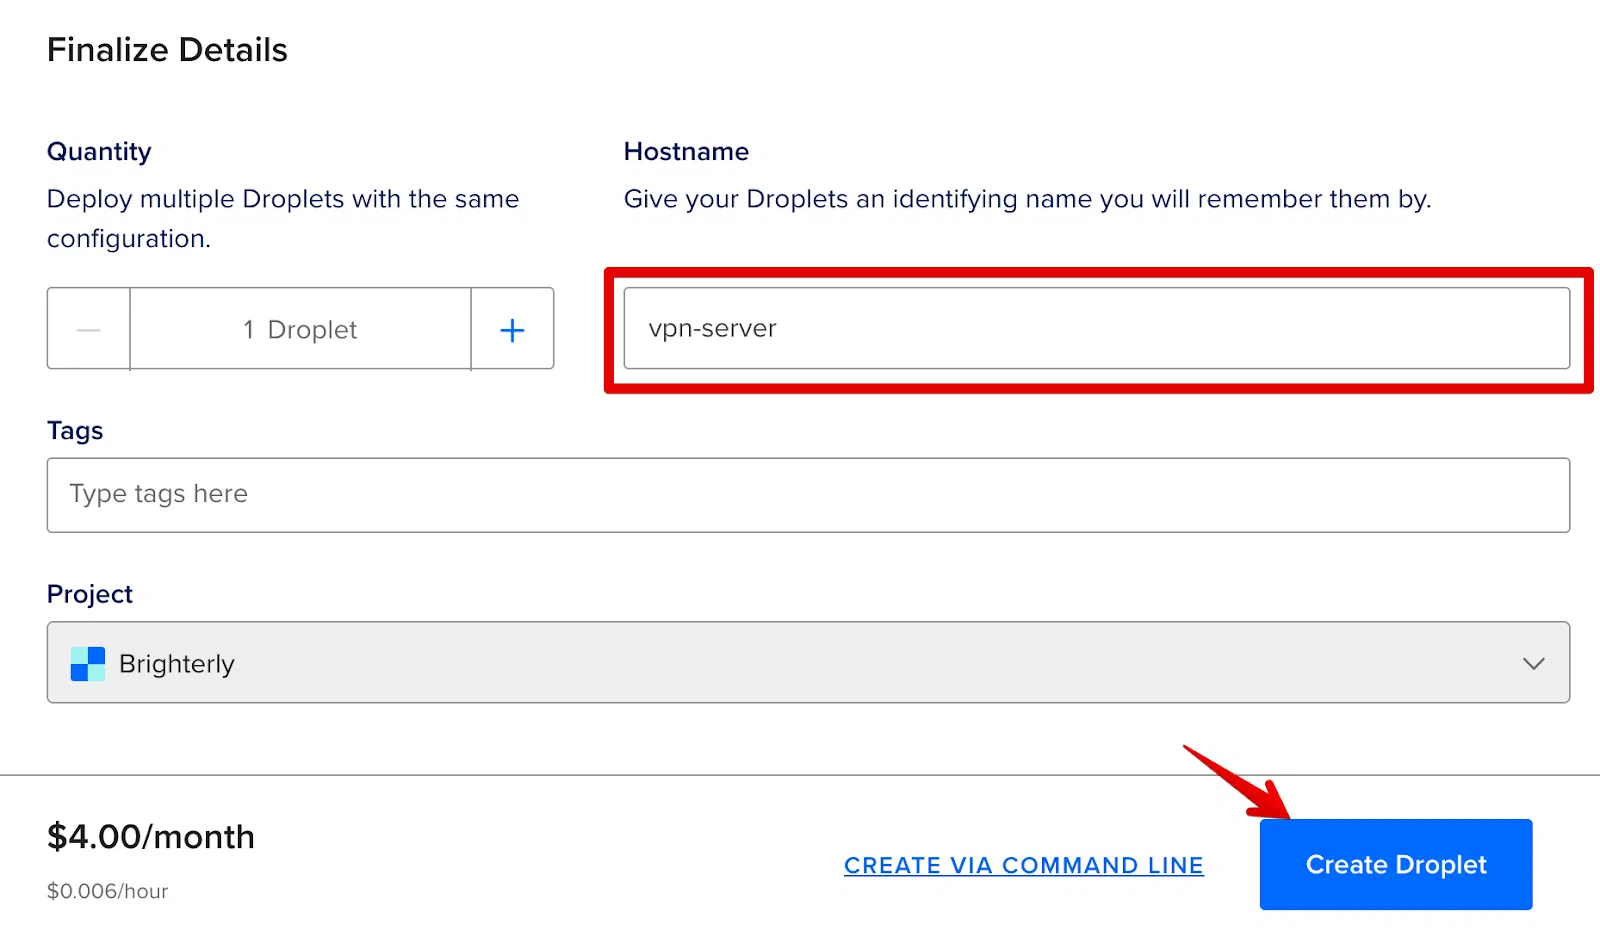
Next, put a name in Hostname, such as ‘vpn-server’. This has no effect and is simply for your convenience. Next, click the Create Droplet button.
Wait for the server to be created. This might take up to a minute. Following that, you will be given your server's IP address.

Connect to the SSH server
Launch Terminal on MacOS/Linux (or PowerShell/putty on Windows) and connect to our server through SSH using the root username and the IP address of our server.
This can be done with the help of:
ssh root@{your-ip-address}
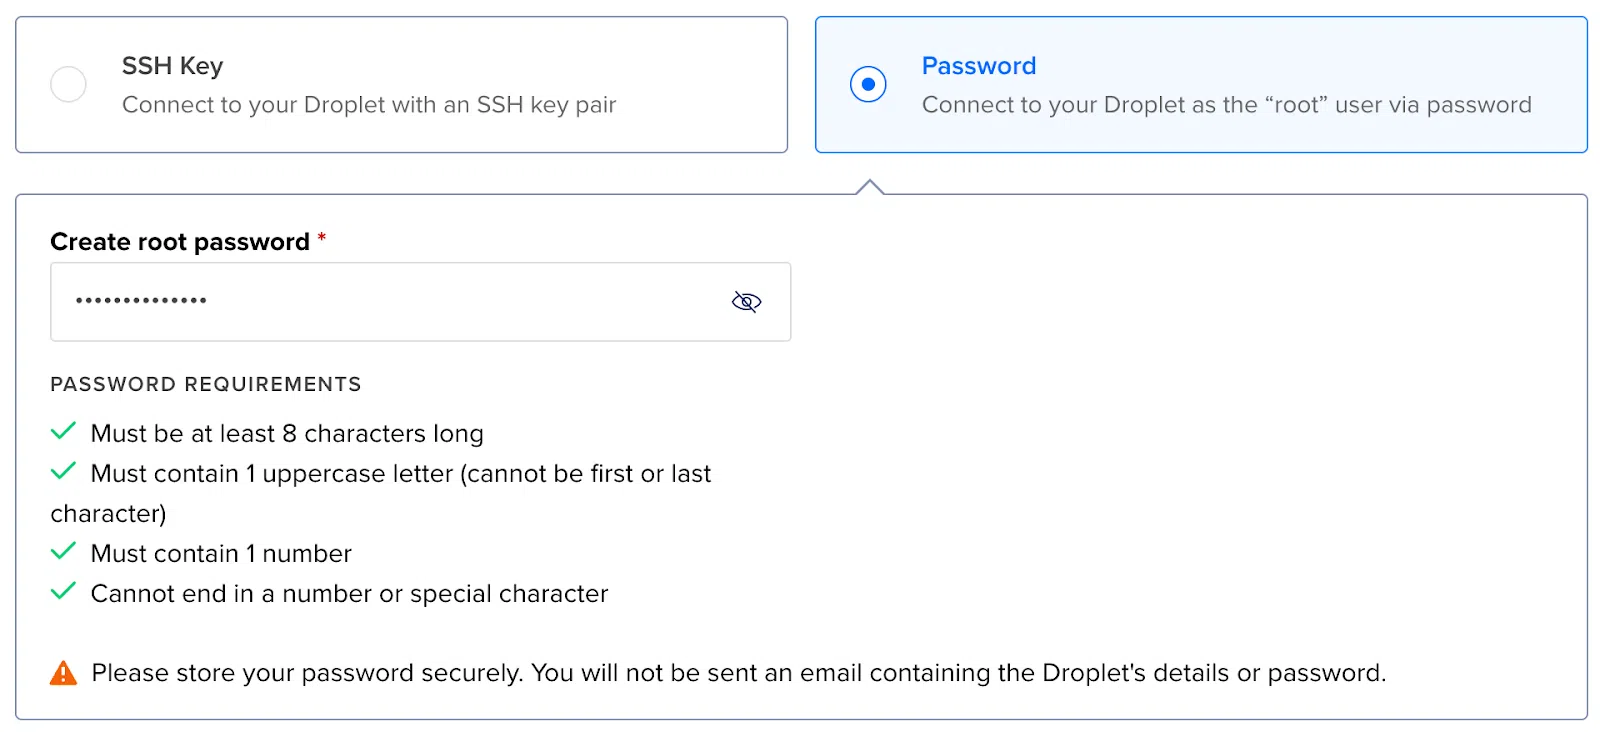
> enter your password

After that, you have to connect.
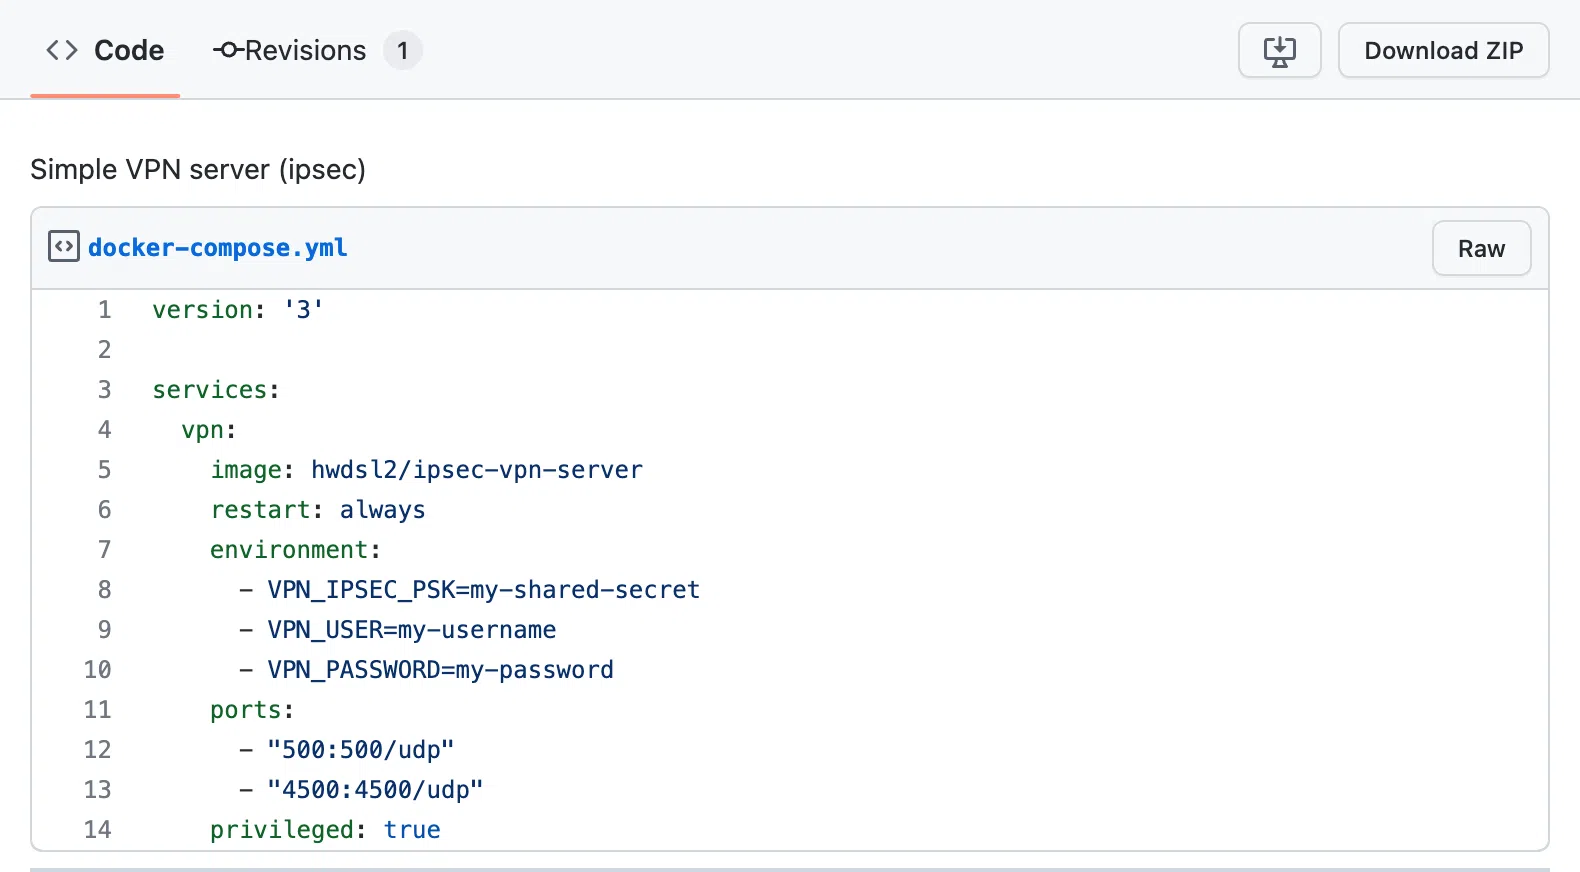
Create a docker-compose.yml file
Just copy the code from this website and paste it into your file. This is your server configuration file.
You may create a file directly over SSH using console text editors (nano/vim) or with an SFTP client. I used SSH to access the console editor.
In the same SSH window, input the following:
> nano docker-compose.yml
Paste the content. In the added text, change the following parameters for yourself:
• my-shared-secret — your secret word
• my-username — your personal login
• my-password — your password
Take note of how straightforward it is — there are just 14 lines in the file that we want.
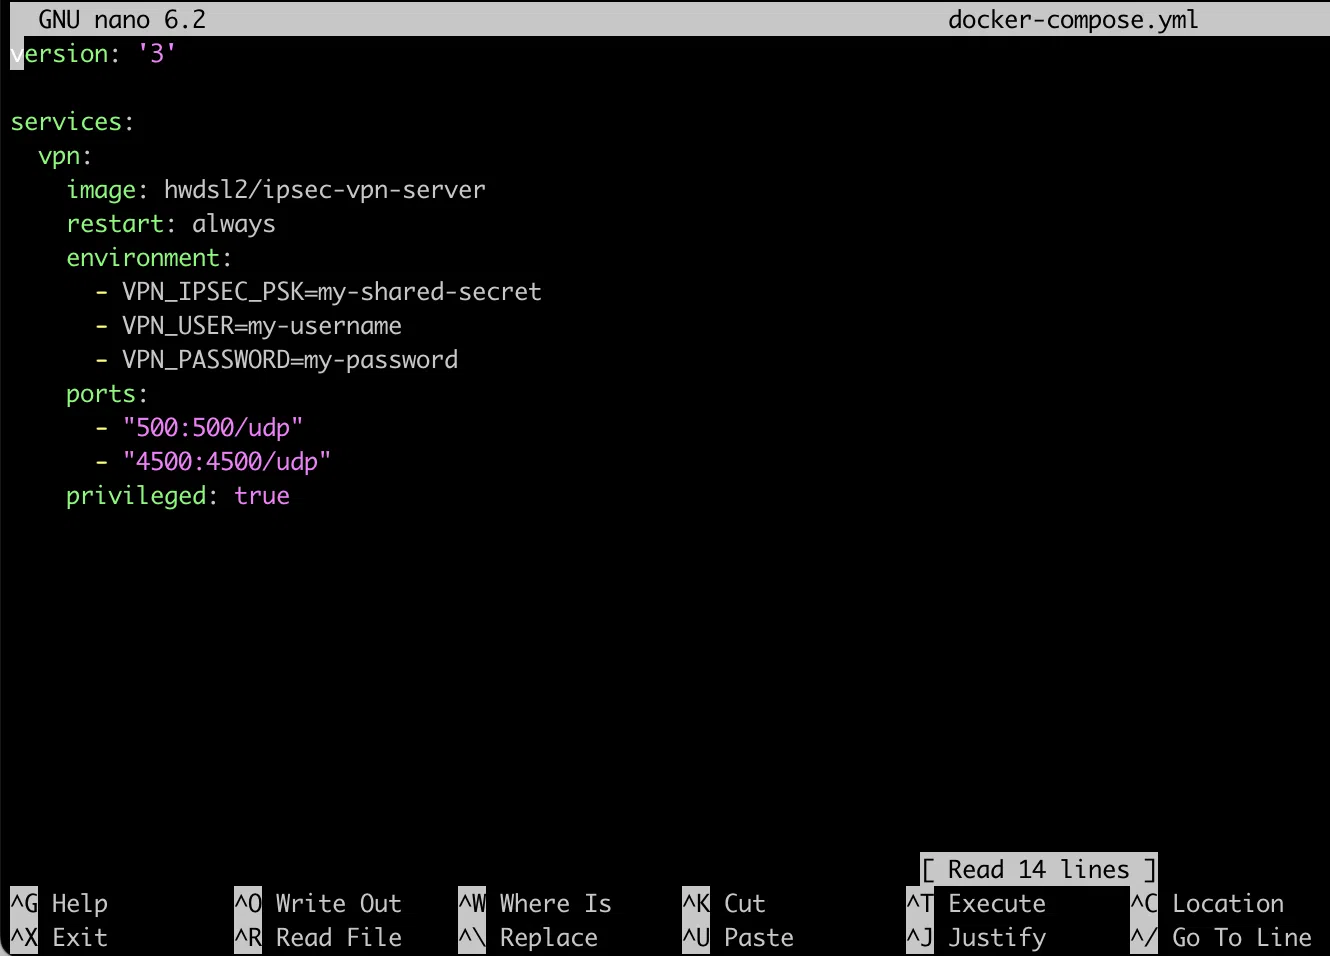
Exit by pressing Ctrl+X, then Y, and then press Enter.
Run the container with the recently created server
Use the same SSH window in which we just created the file.
> docker compose up -d
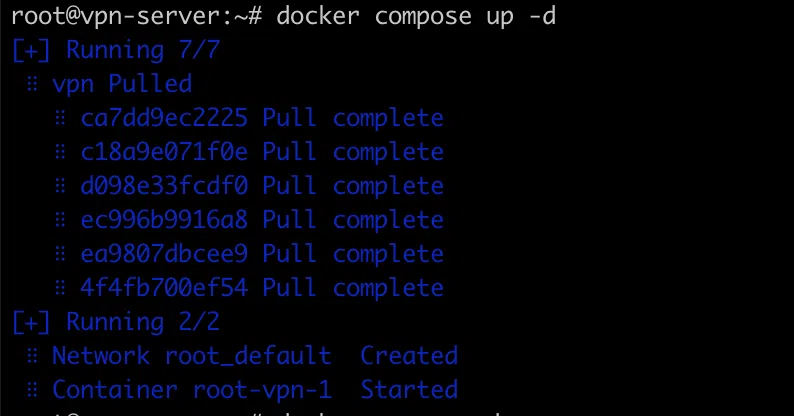
Congratulations! Your VPN server is up and running. So, how do you connect it?
Connect to the created VPN server
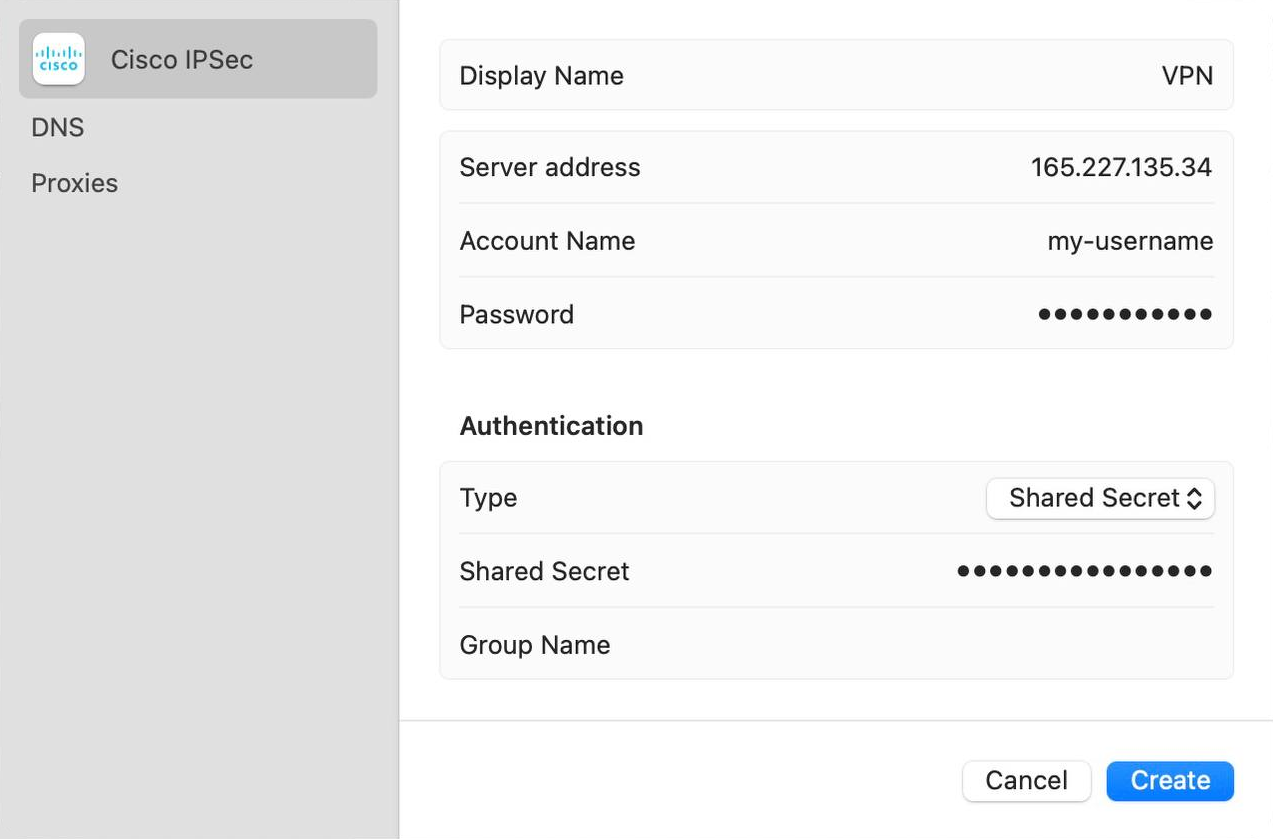
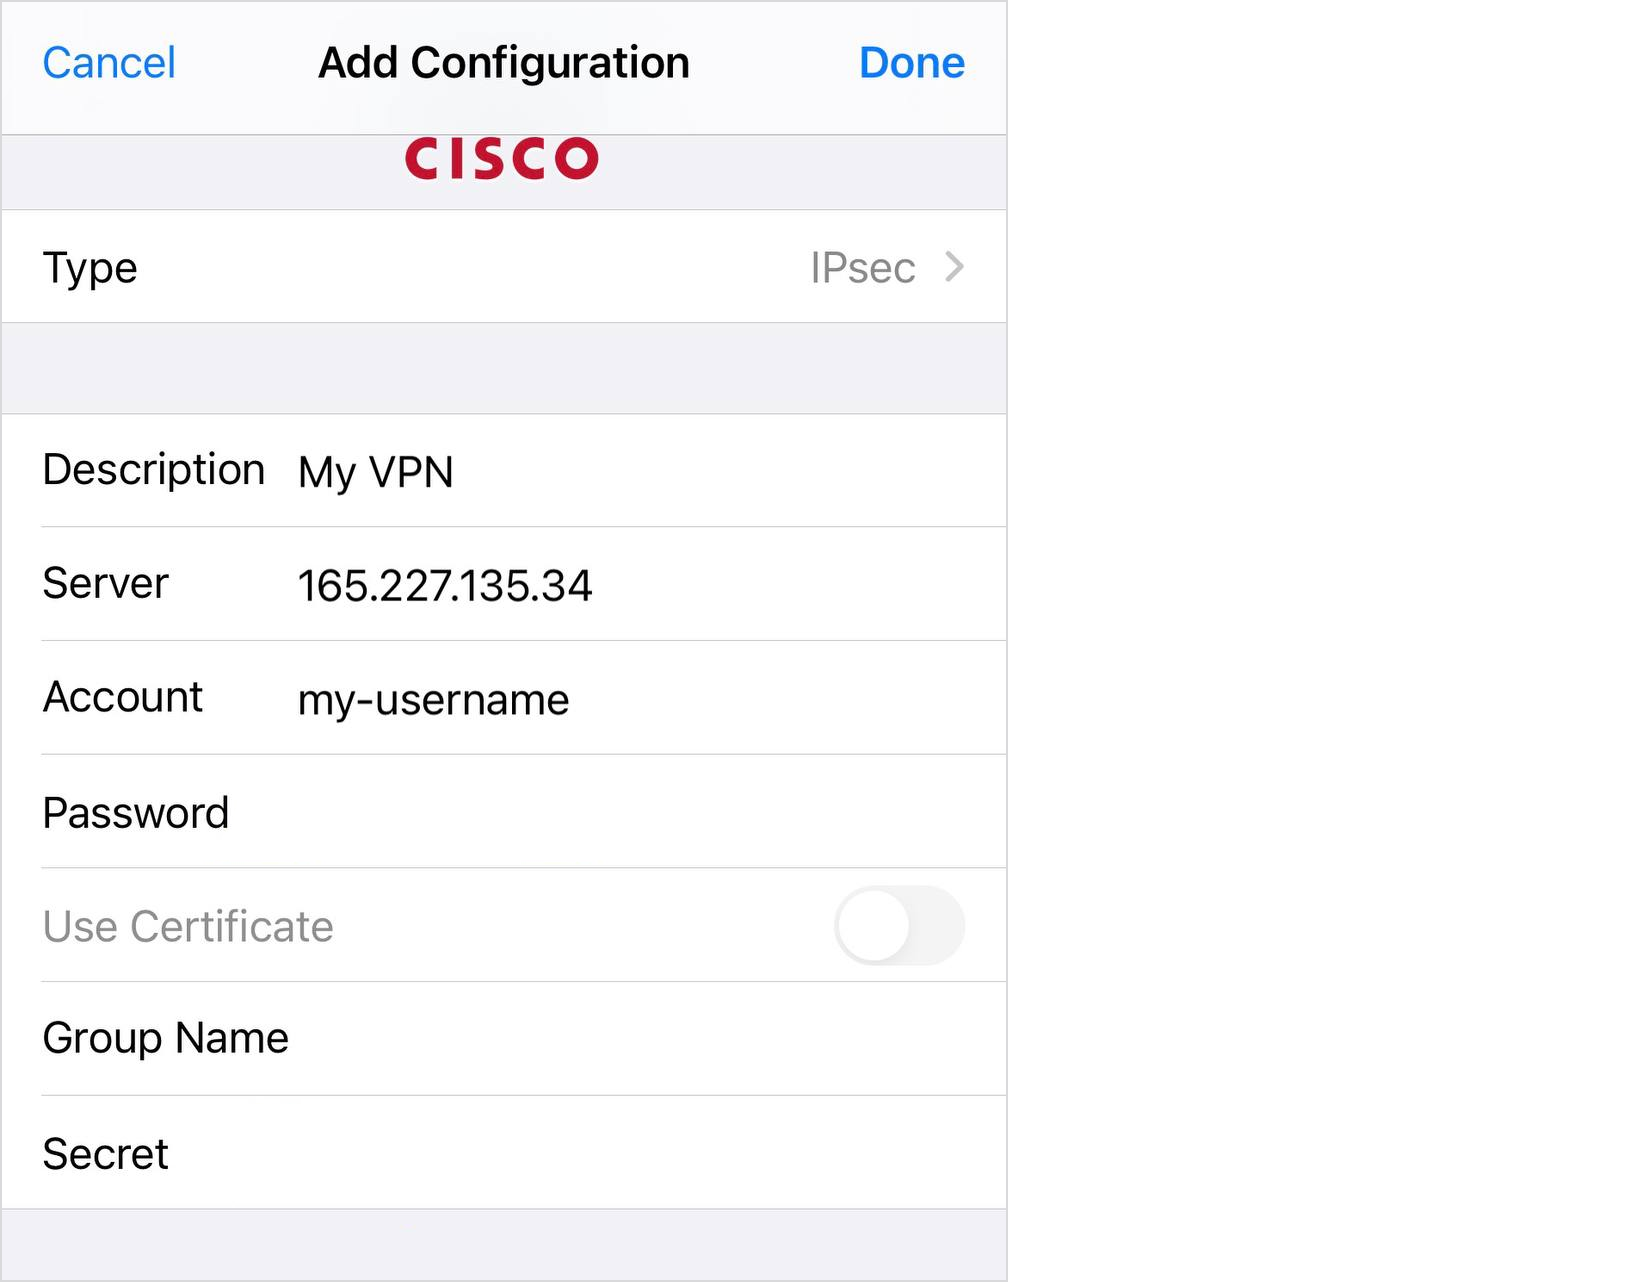
We recommend using IPsec because the clients for this VPN are already built into MacOS/Windows and you don't have to install anything locally. You just need to create a new VPN connection with the following parameters:
• Type: IPSec
• Server address: enter the IP address of the server
• Account name: write my-username (or the one you changed it to)
• Password: add my-password (or the one you changed it to)
• Shared Secret: write my-shared-secret (or the variant you changed earlier)
For MacOS, you don't need to install anything, just configure it like this:
For Windows, these settings will look a little different:
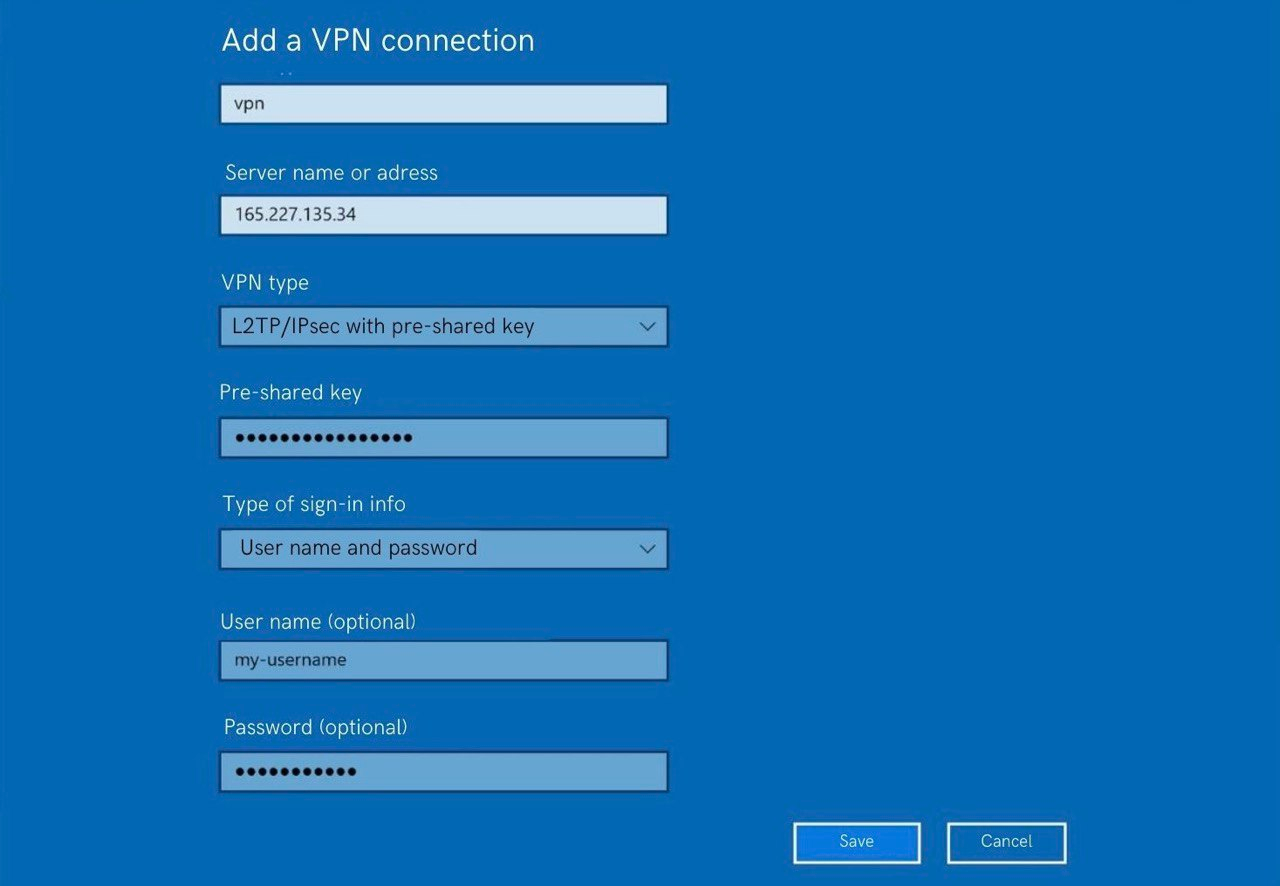
Unfortunately, Windows is not so simple and you will have to surf the registry and allow NAT-T.
For Linux users, there is also a screenshot with the required settings (I used them in Ubuntu 22.04):
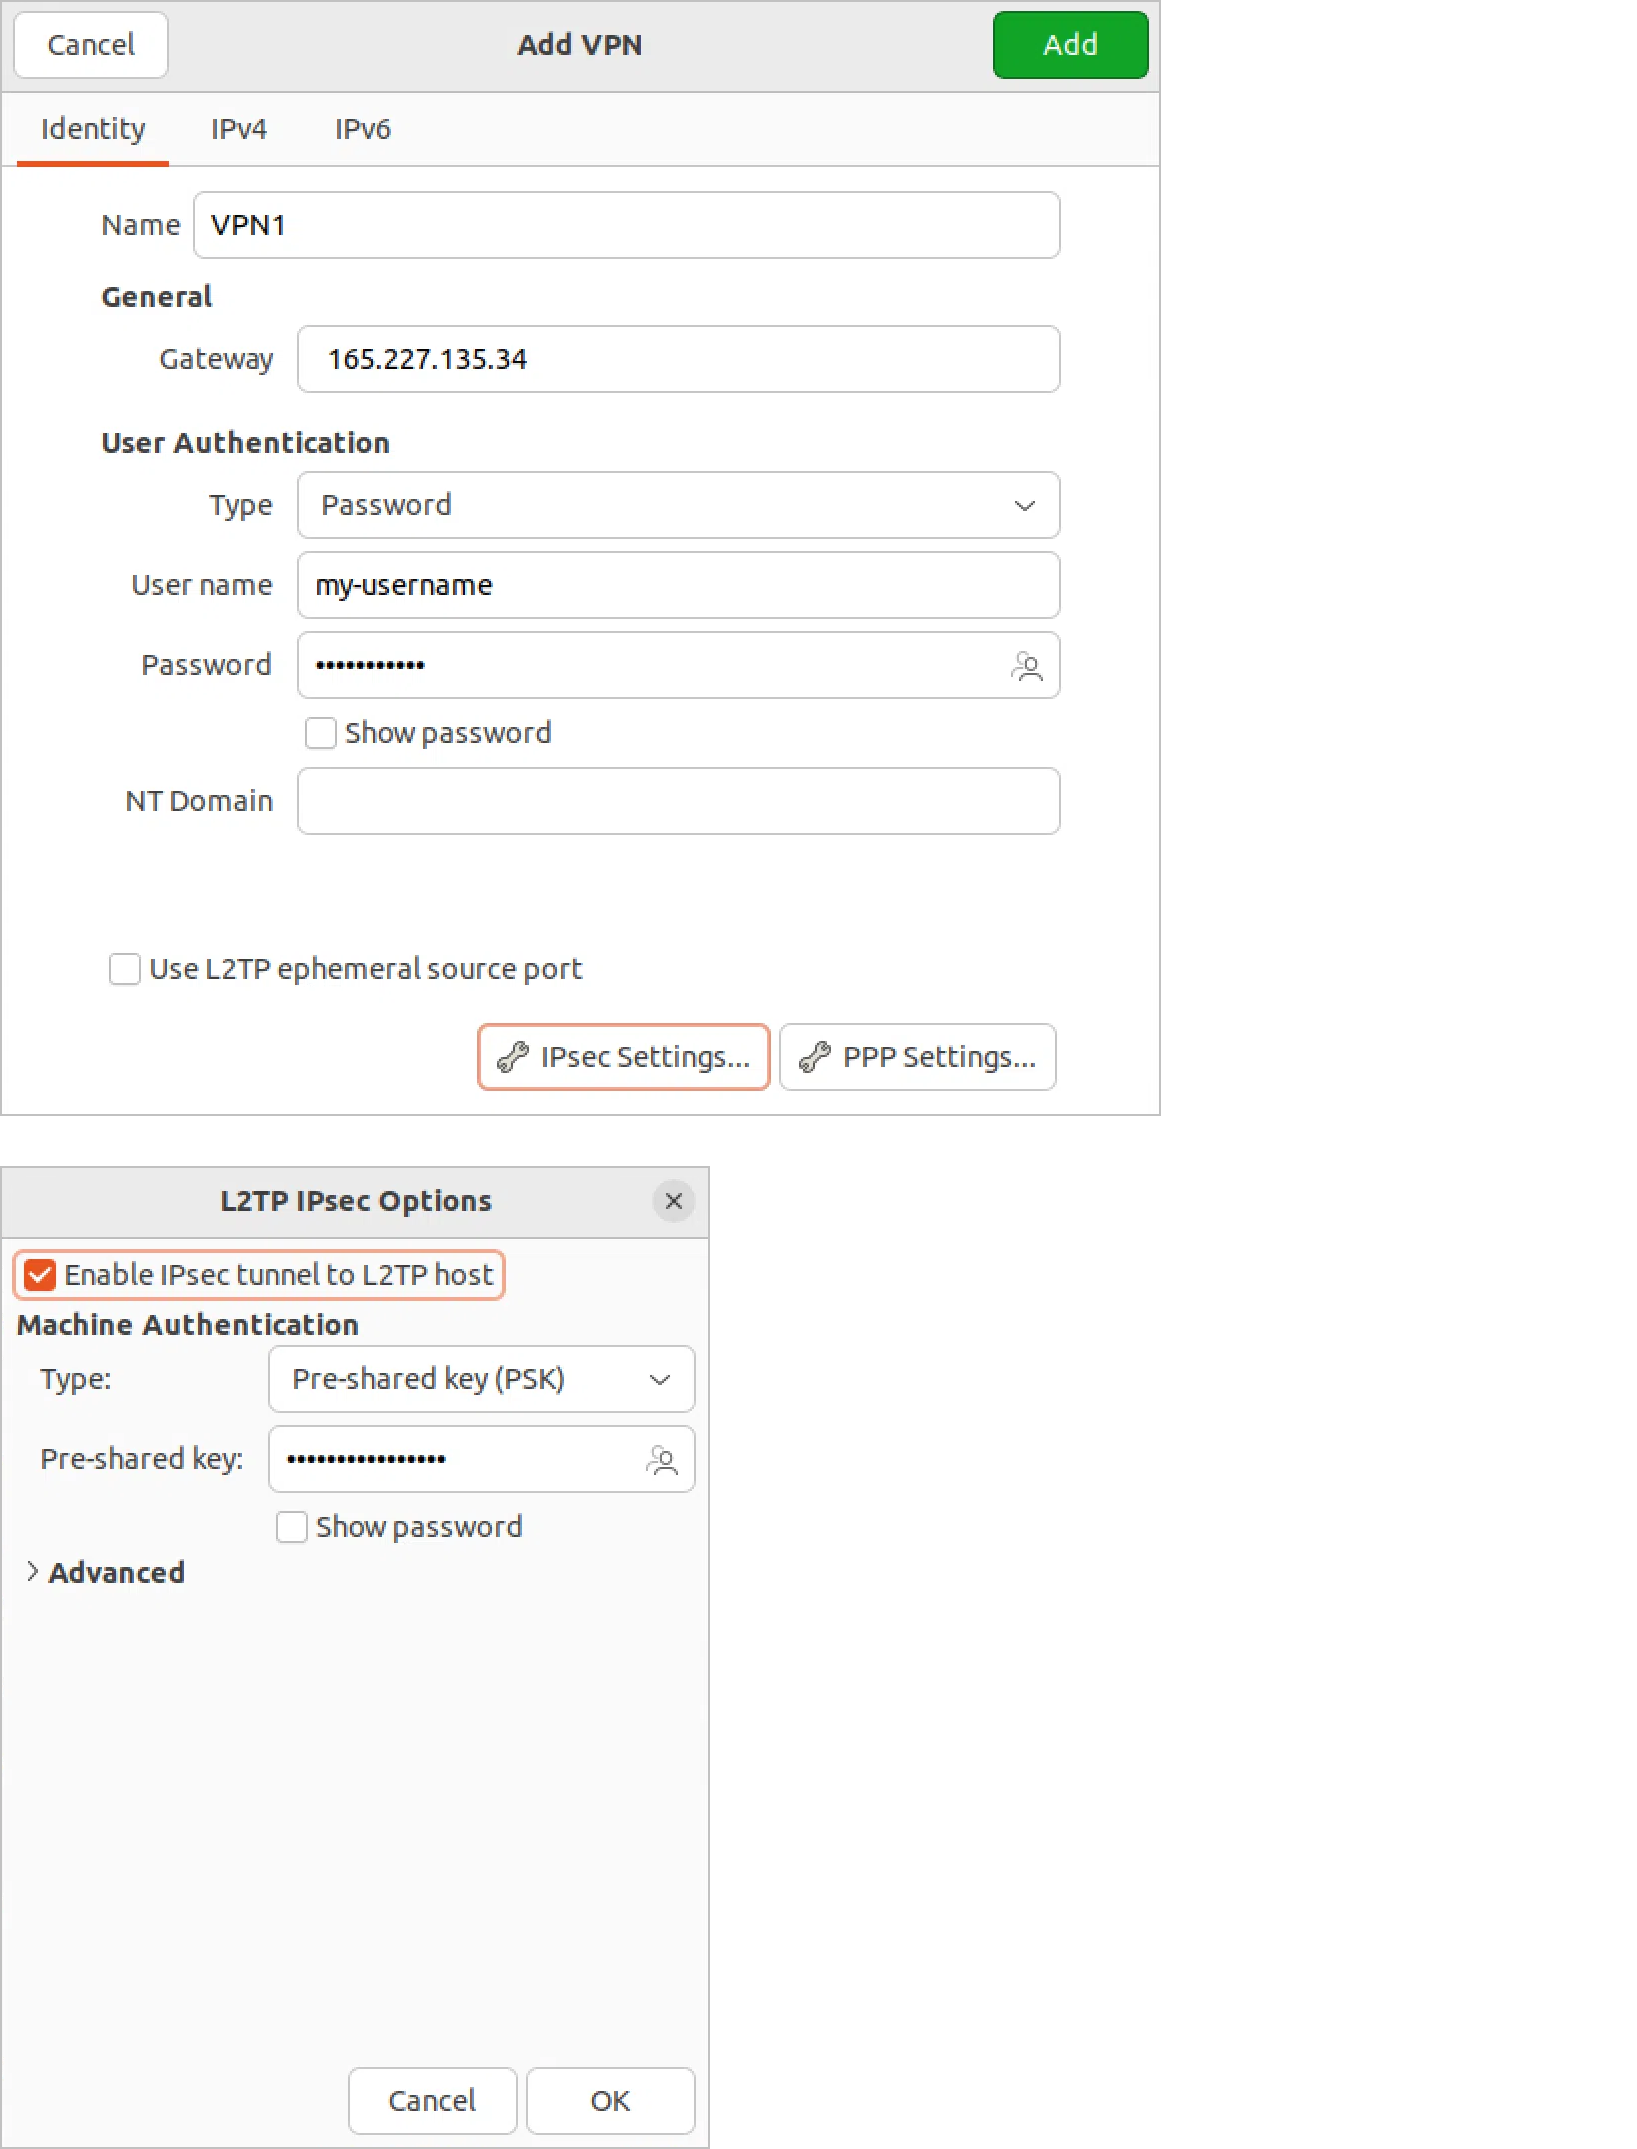
Before setting up, you need to install the network-manager-l2tp-gnome package. This is done through the console:
> sudo apt-get install network-manager-l2tp-gnome
You can also connect from your phone, you don't need to install anything else. The settings on the iPhone look like this:
And that’s it — you're done! Connect and check the IP address, for example, on Whoer via the link. Now, for the whole Internet, you are physically located in the region where you created your VPN server, and the IP is the IP of the server. It's not as scary, time-consuming, or expensive as you might think.
Security recommendations
When it comes to the security of your server, I would, as a final thought, recommend:
• Using an SSH key instead of a password
• Changing the SSH-port from 22 to any other
• Using a complex password and Shared-secret (preferably a randomly generated string)
