7 ways to create self-signed certificates on Windows
Self-signed certificates are widely used in testing environments and they are excellent alternatives to purchasing and renewing yearly certifications.
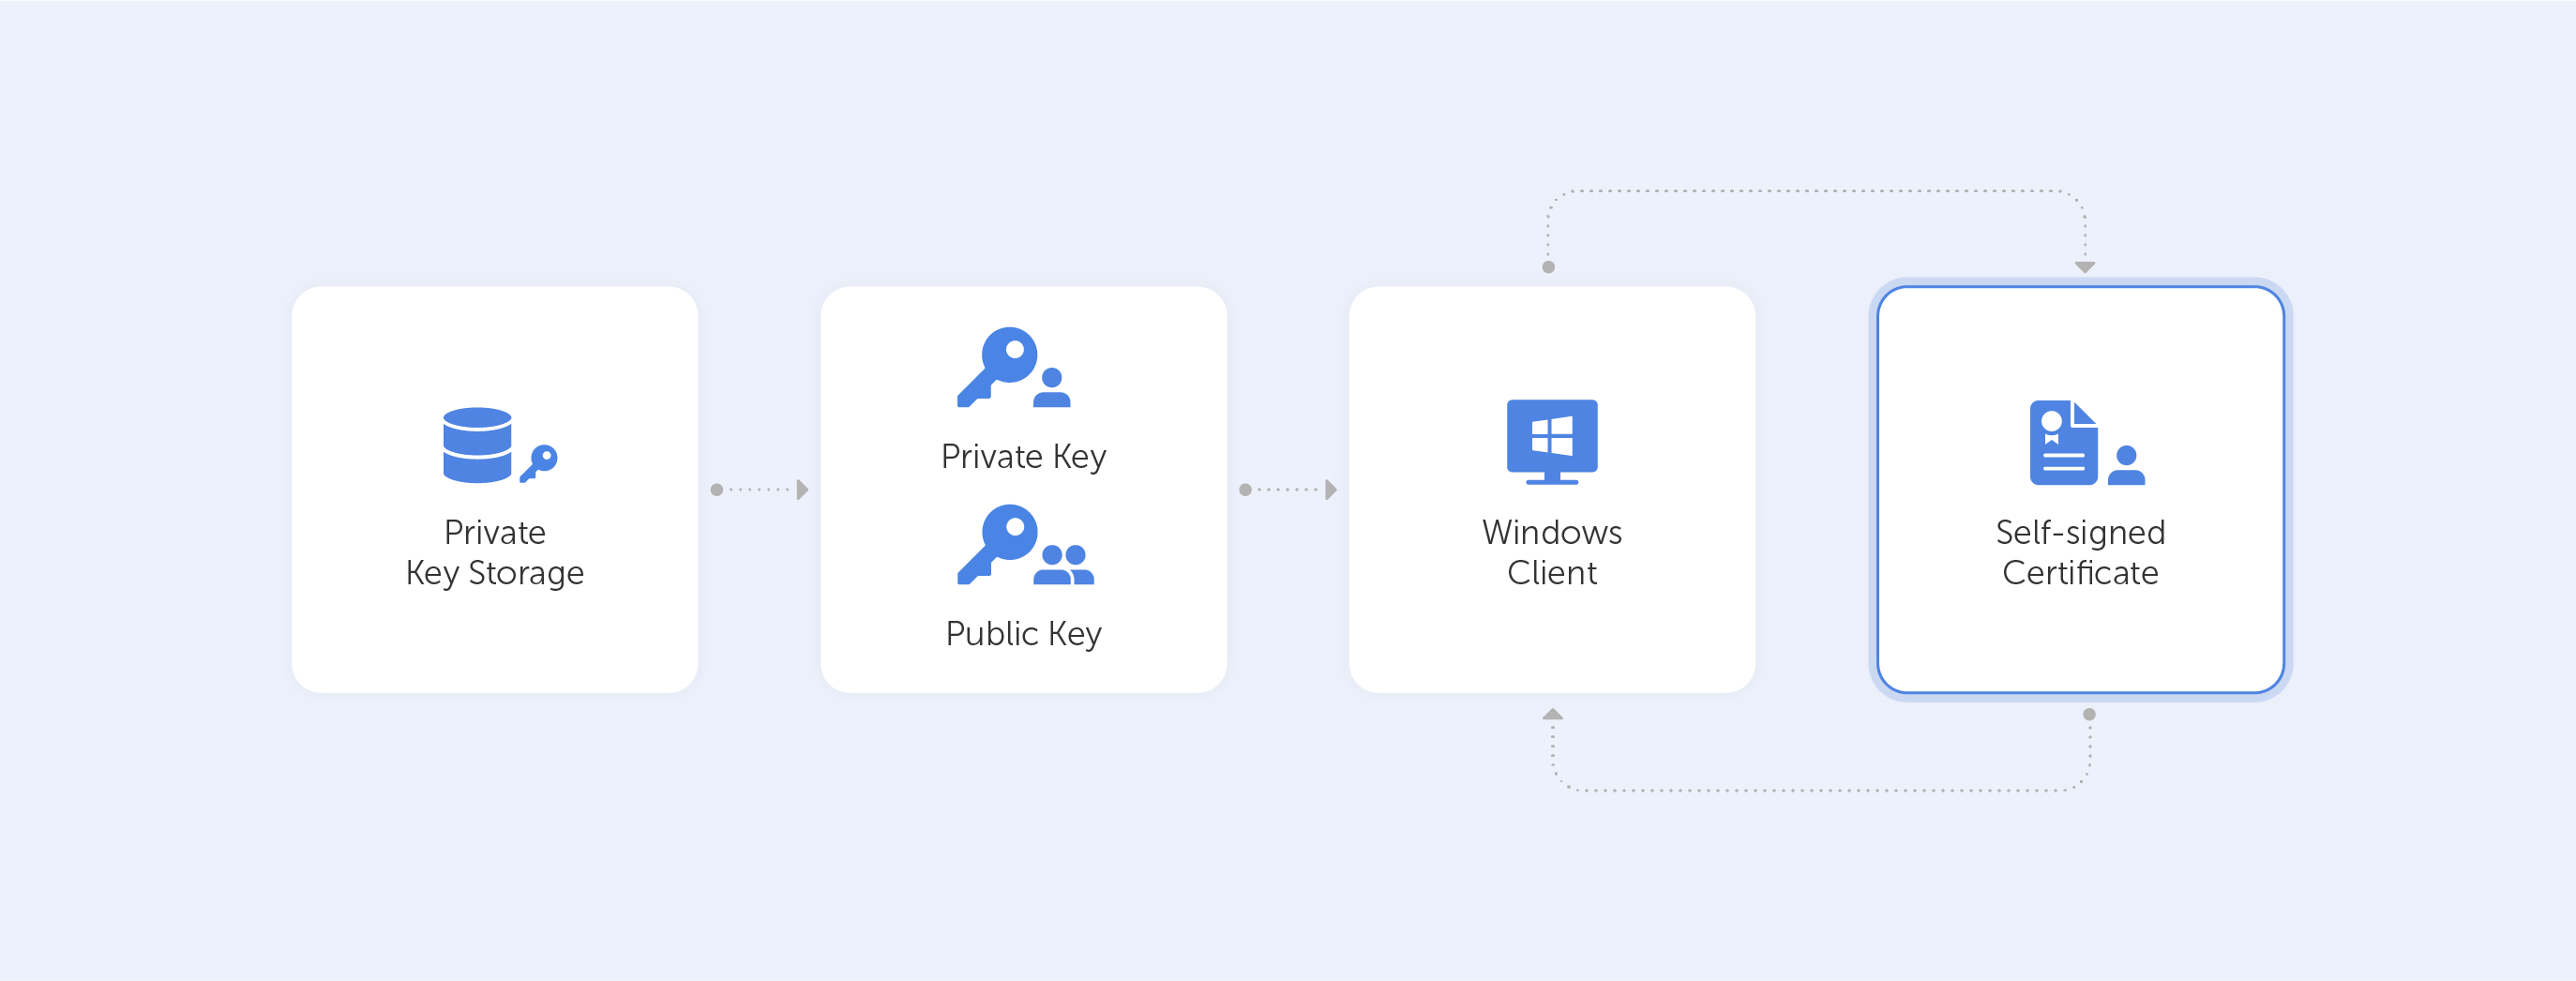
That is of course if you know how and, more importantly, when to use them. Remember, that A self-signed certificate is not signed by a publicly trusted Certificate Authority (CA). Self-signed certificates are considered different from traditional CA certificates that are signed and issued by a CA because self-signed certificates are created, issued, and signed by the company or developer who is responsible for the website or software associated with the certificate.
You are probably reading this article because for some reason, you need to create a self-signed certificate with Windows. So, we’ve tried to outline the easiest ways to do that. This article is up-to-date as of December 2021. By the way, we’re referring to Windows 10 for all the following tutorials. As far as we know, the processes for Windows 11 are identical.
So what are our options?
Using Let’s Encrypt.
These guys offer free CA certificates with various SAN and wildcard support. The certificate is only good for 90 days, but they do give an automated renewal method. This is a great alternative for a quick proof-of-concept. Other options would require more typing, for sure.
But this option works only if you want to generate a certificate for your website. The best way to start is by going to Getting Started, the instructions thereafter are very easy to follow.
Other one-click option:
We’ve reviewed different online services that allow you to easily generate self-signed certificates. We’ve sorted them from one-click to advanced, and the first one is:
Just enter your domain name — and you are ready to go:
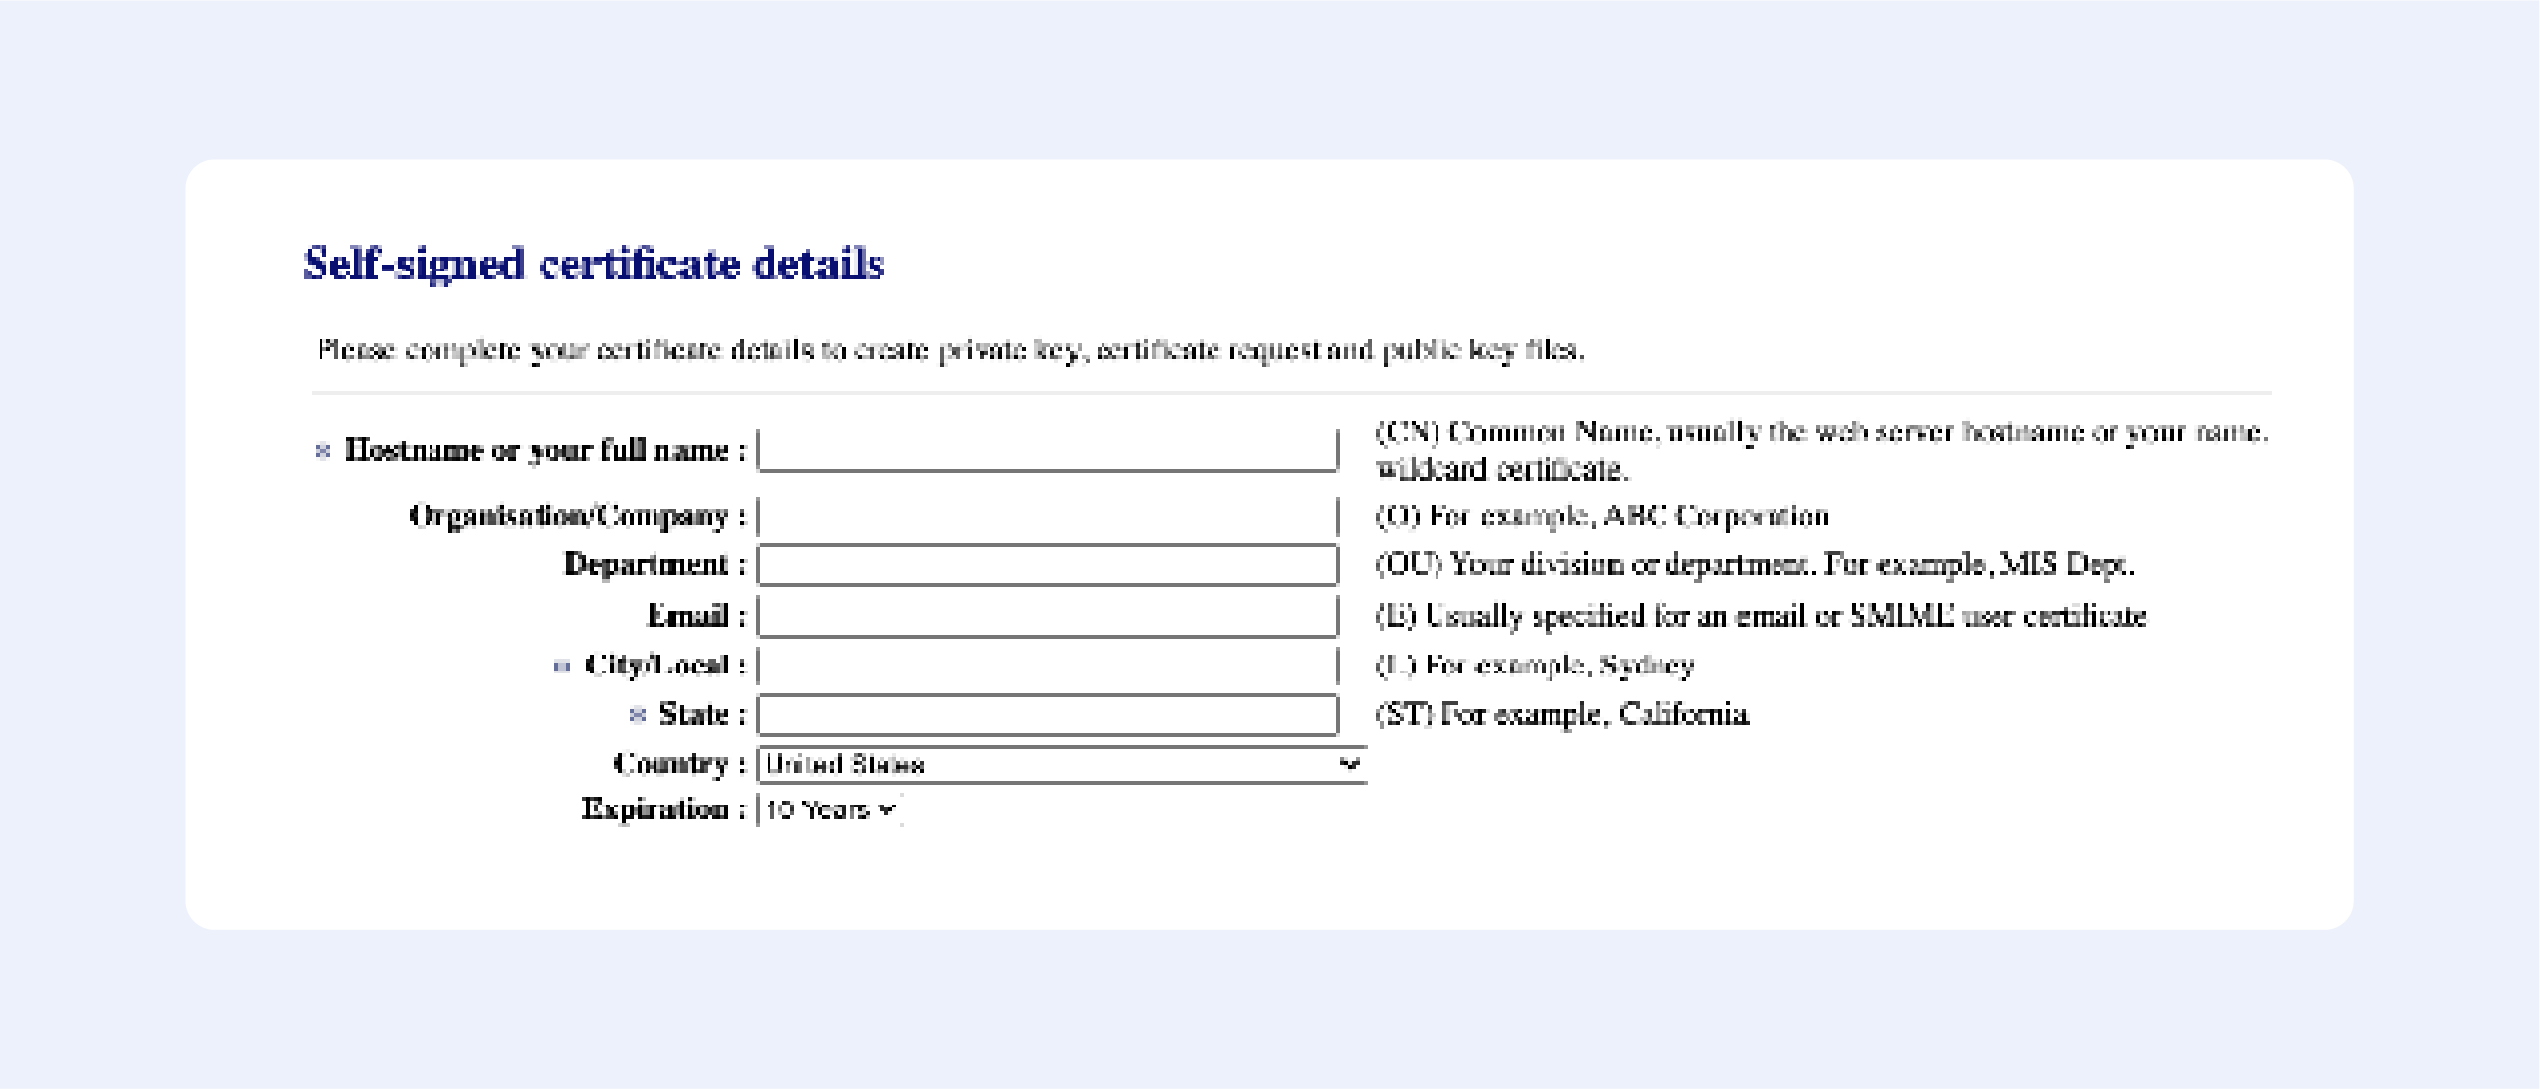
Fill out the following fields:
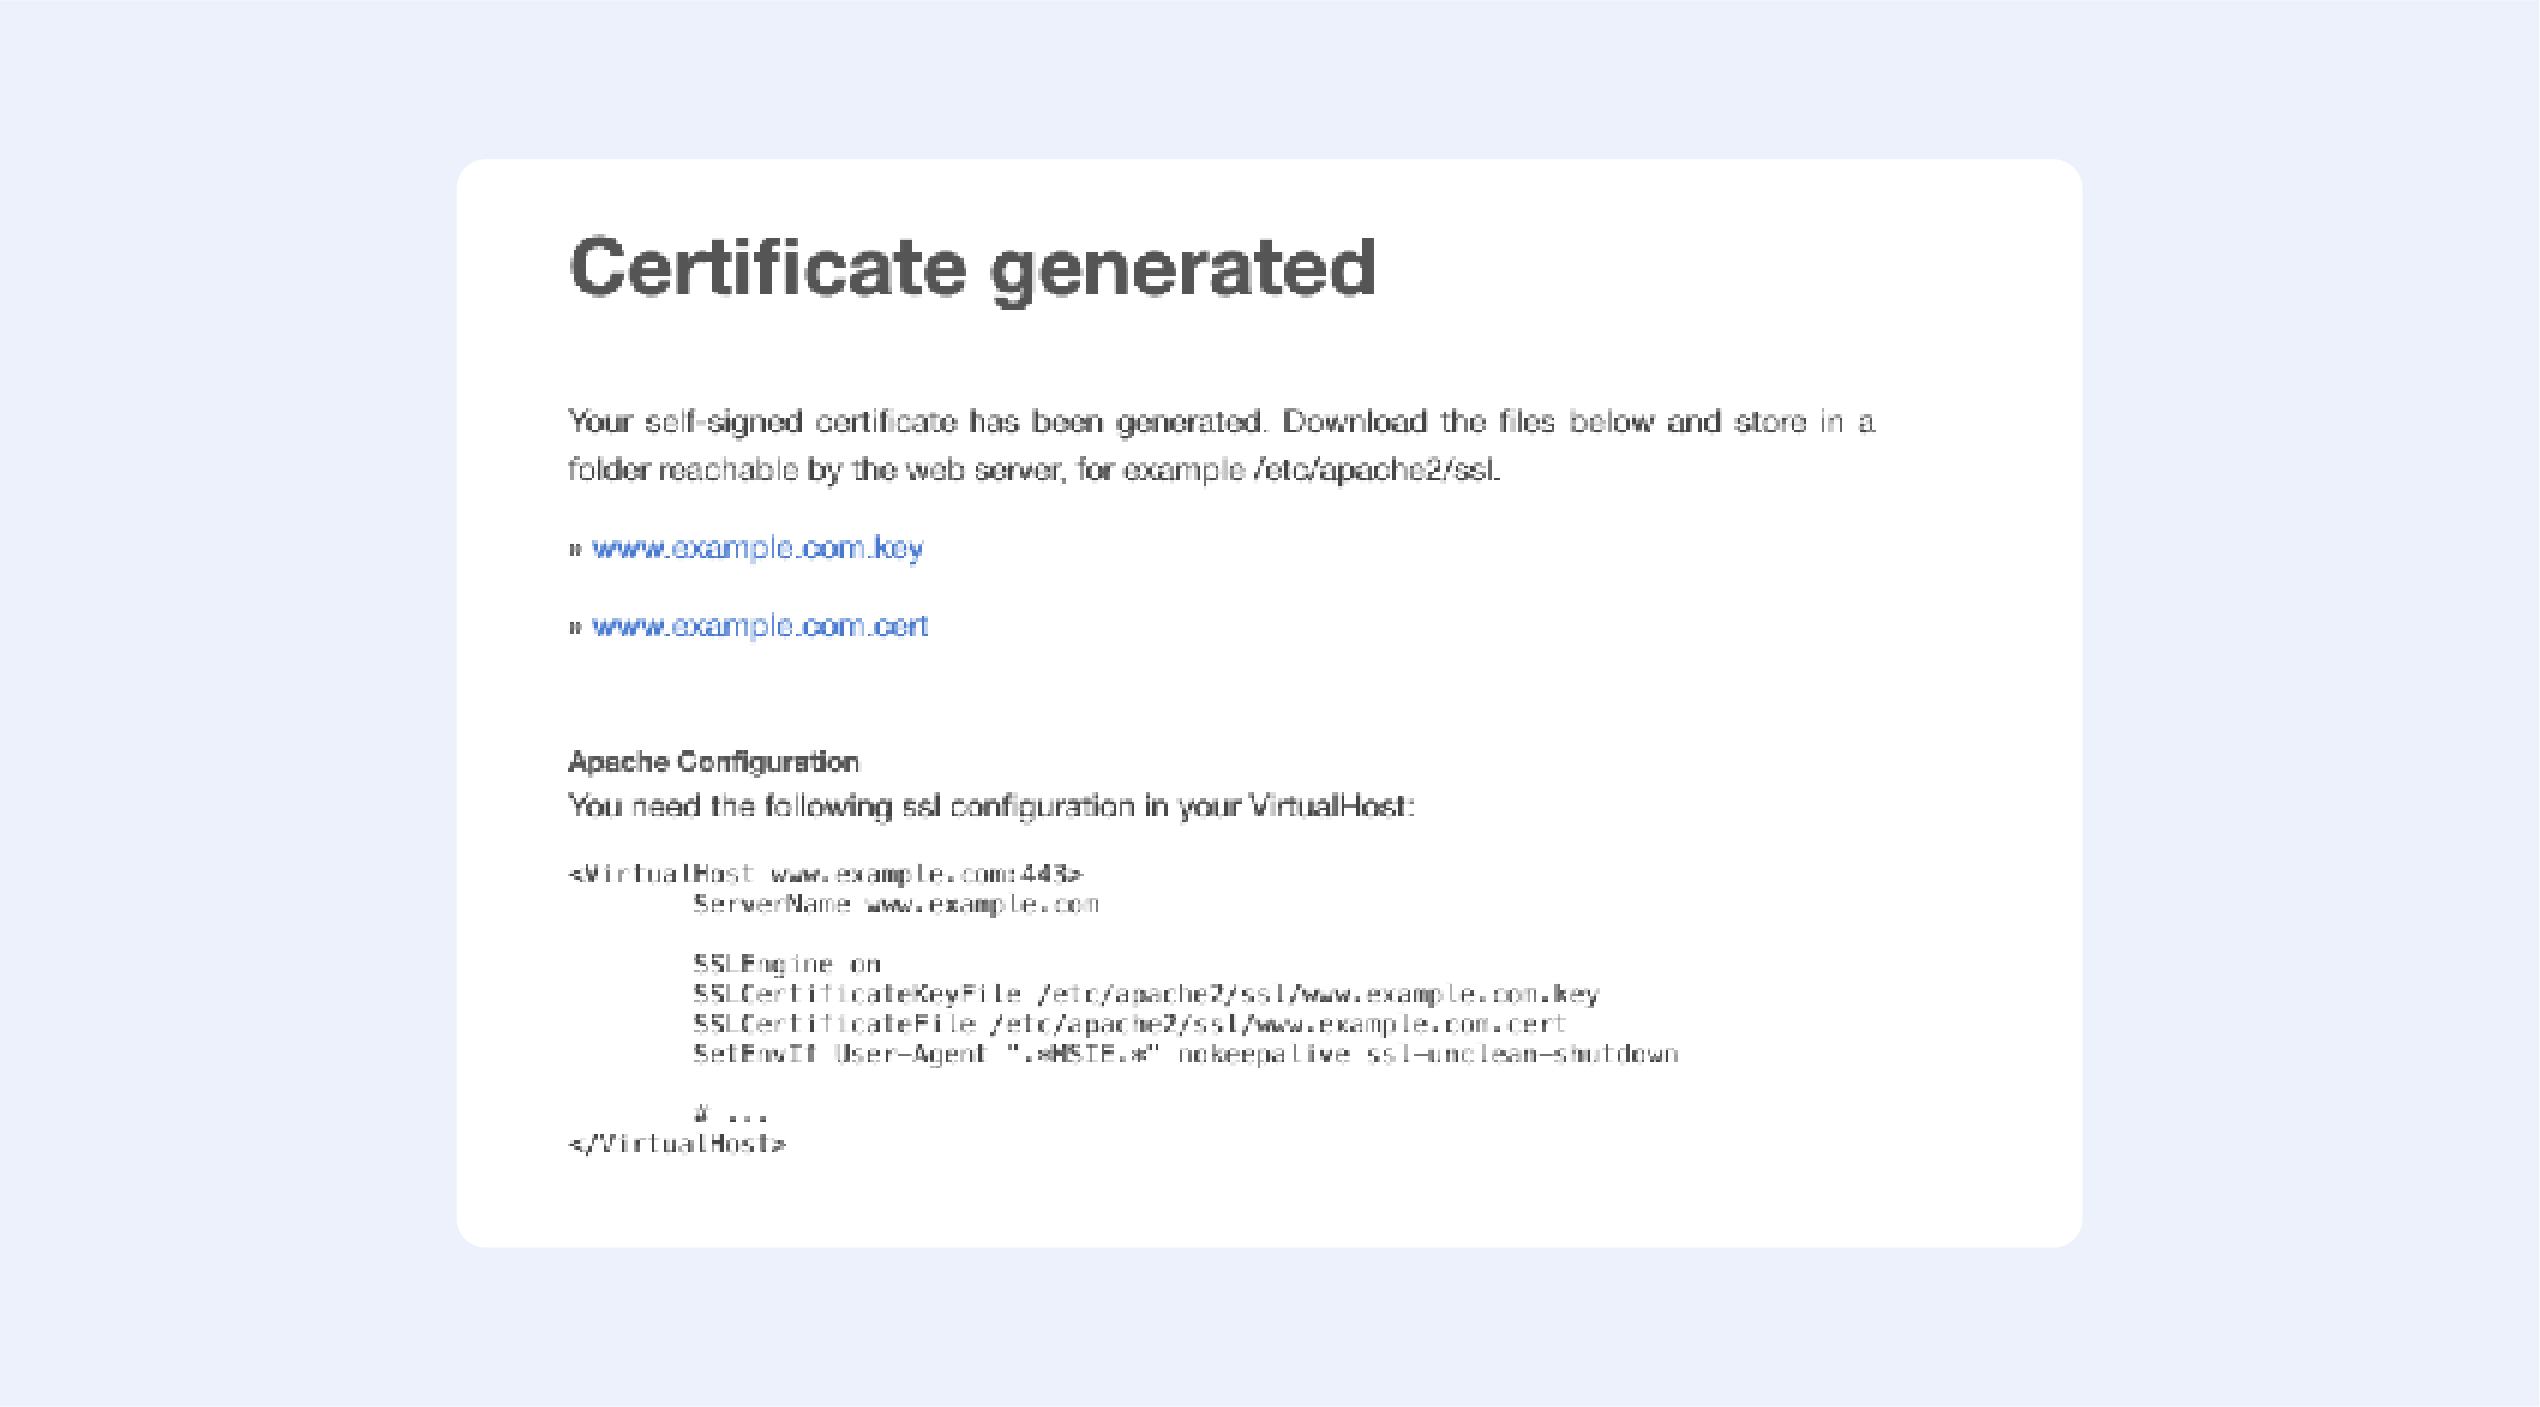
Press “Next”, then confirm your details, and get your certificate:
It’s that easy!
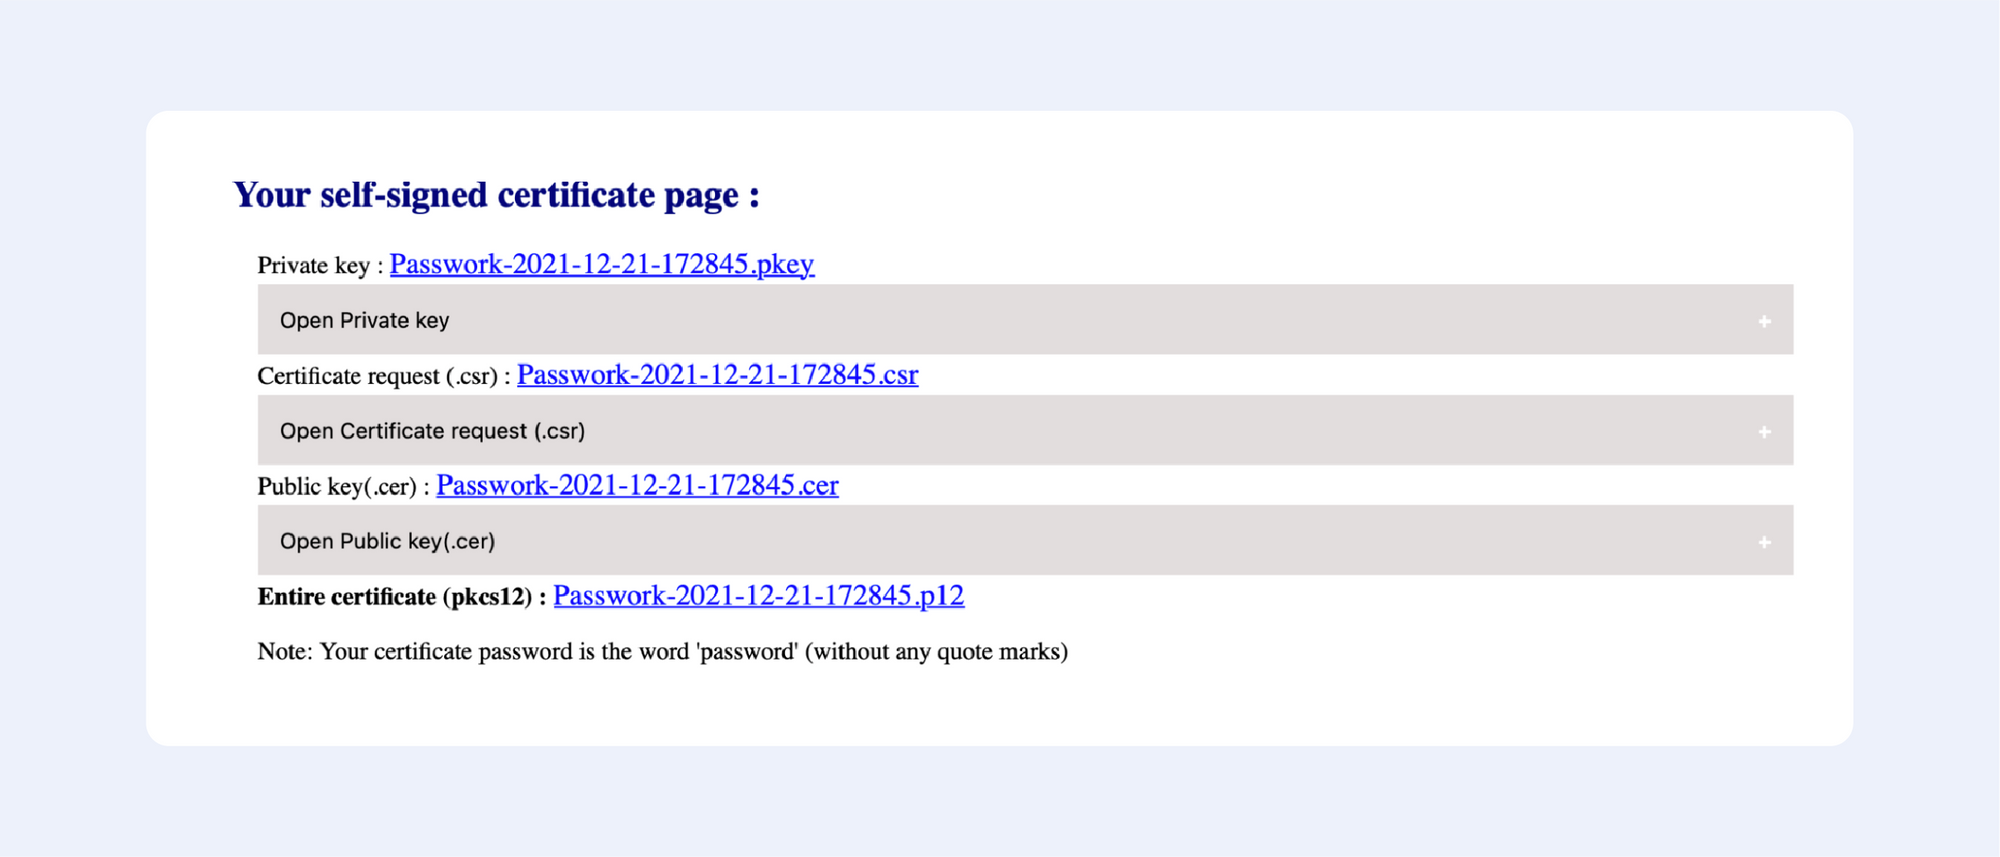
Among the online services that allow you to generate self-signed certificates, this one is the most advanced; just look at all available options to choose from:

Now let’s continue with offline solutions, that are a bit more advanced:
PowerShell 4.0
1. Press the Windows key, type Powershell. Right-click on PowerShell and select Run as Administrator.
2. Run the New-SelfsignedCertificate command, as shown below.
$cert = New-SelfSignedCertificate -certstorelocation
cert:localmachinemy -dnsname passwork.com
3. This will add the certificate to the locater store on your PC. Replace passwork.com with your domain name in the above command.
4. Next, create a password for your export file:
$pwd = ConvertTo-SecureString -String ‘password!’ -Force -AsPlainText5. Replace password with your own password.
6. Enter the following command to export the self-signed certificate:
$path = 'cert:localMachinemy' + $cert.thumbprint
Export-PfxCertificate -cert $path -FilePath
c:tempcert.pfx -Password $pwd
7. In the above command, replace c:temp with the directory where you want to export the file.
8. Import the exported file and deploy it for your project.
Use OpenSSL
1. Download the latest OpenSSL windows installer from a third-party source;
2. Run the installer. OpenSSL requires Microsoft Visual C++ to run. The installer will prompt you to install Visual C++ if it is already not installed;
3. Click Yes to install;
4. Run the OpenSSL installer again and select the installation directory;
5. Click Next;
6. Open Command Prompt and type OpenSSL to get an OpenSSL prompt.
The next step would be to generate a public/private key file pair.
1. Open Command Prompt and create a new directory on your C drive:
C: >cd Test2. Now go to the new directory:
C: Test>3. Now you need to type the path of the OpenSSL install directory followed by the RSA key algorithm:
C: Test>c:opensslbinopenssl genrsa -out privkey.pem 40964. Run the following command to split the generated file into separate private and public key files:
C: Test>c:opensslbinopenssl ssh-keygen -t rsa -b 4096 -f privkey.pemOnce you have the public/private key generated, follow the next set of steps to create a self-signed certificate file on Windows.
1. Go to the directory that you created earlier for the public/private key file:
C: Test>2. Enter the path of the OpenSSL install directory, followed by the self-signed certificate algorithm:
C: Test>c:opensslbinopenssl req -new -x509 -key privkey.pem -out cacert.pem -days 1093. Follow the on-screen instructions;
4. You need to enter information about your organization, region, and contact details to create a self-signed certificate.
We also have a detailed article on OpenSSL – it contains more in-depth instructions on generating self-signed certificates.
Using IIS
This is one of those hidden features that very few people know about.
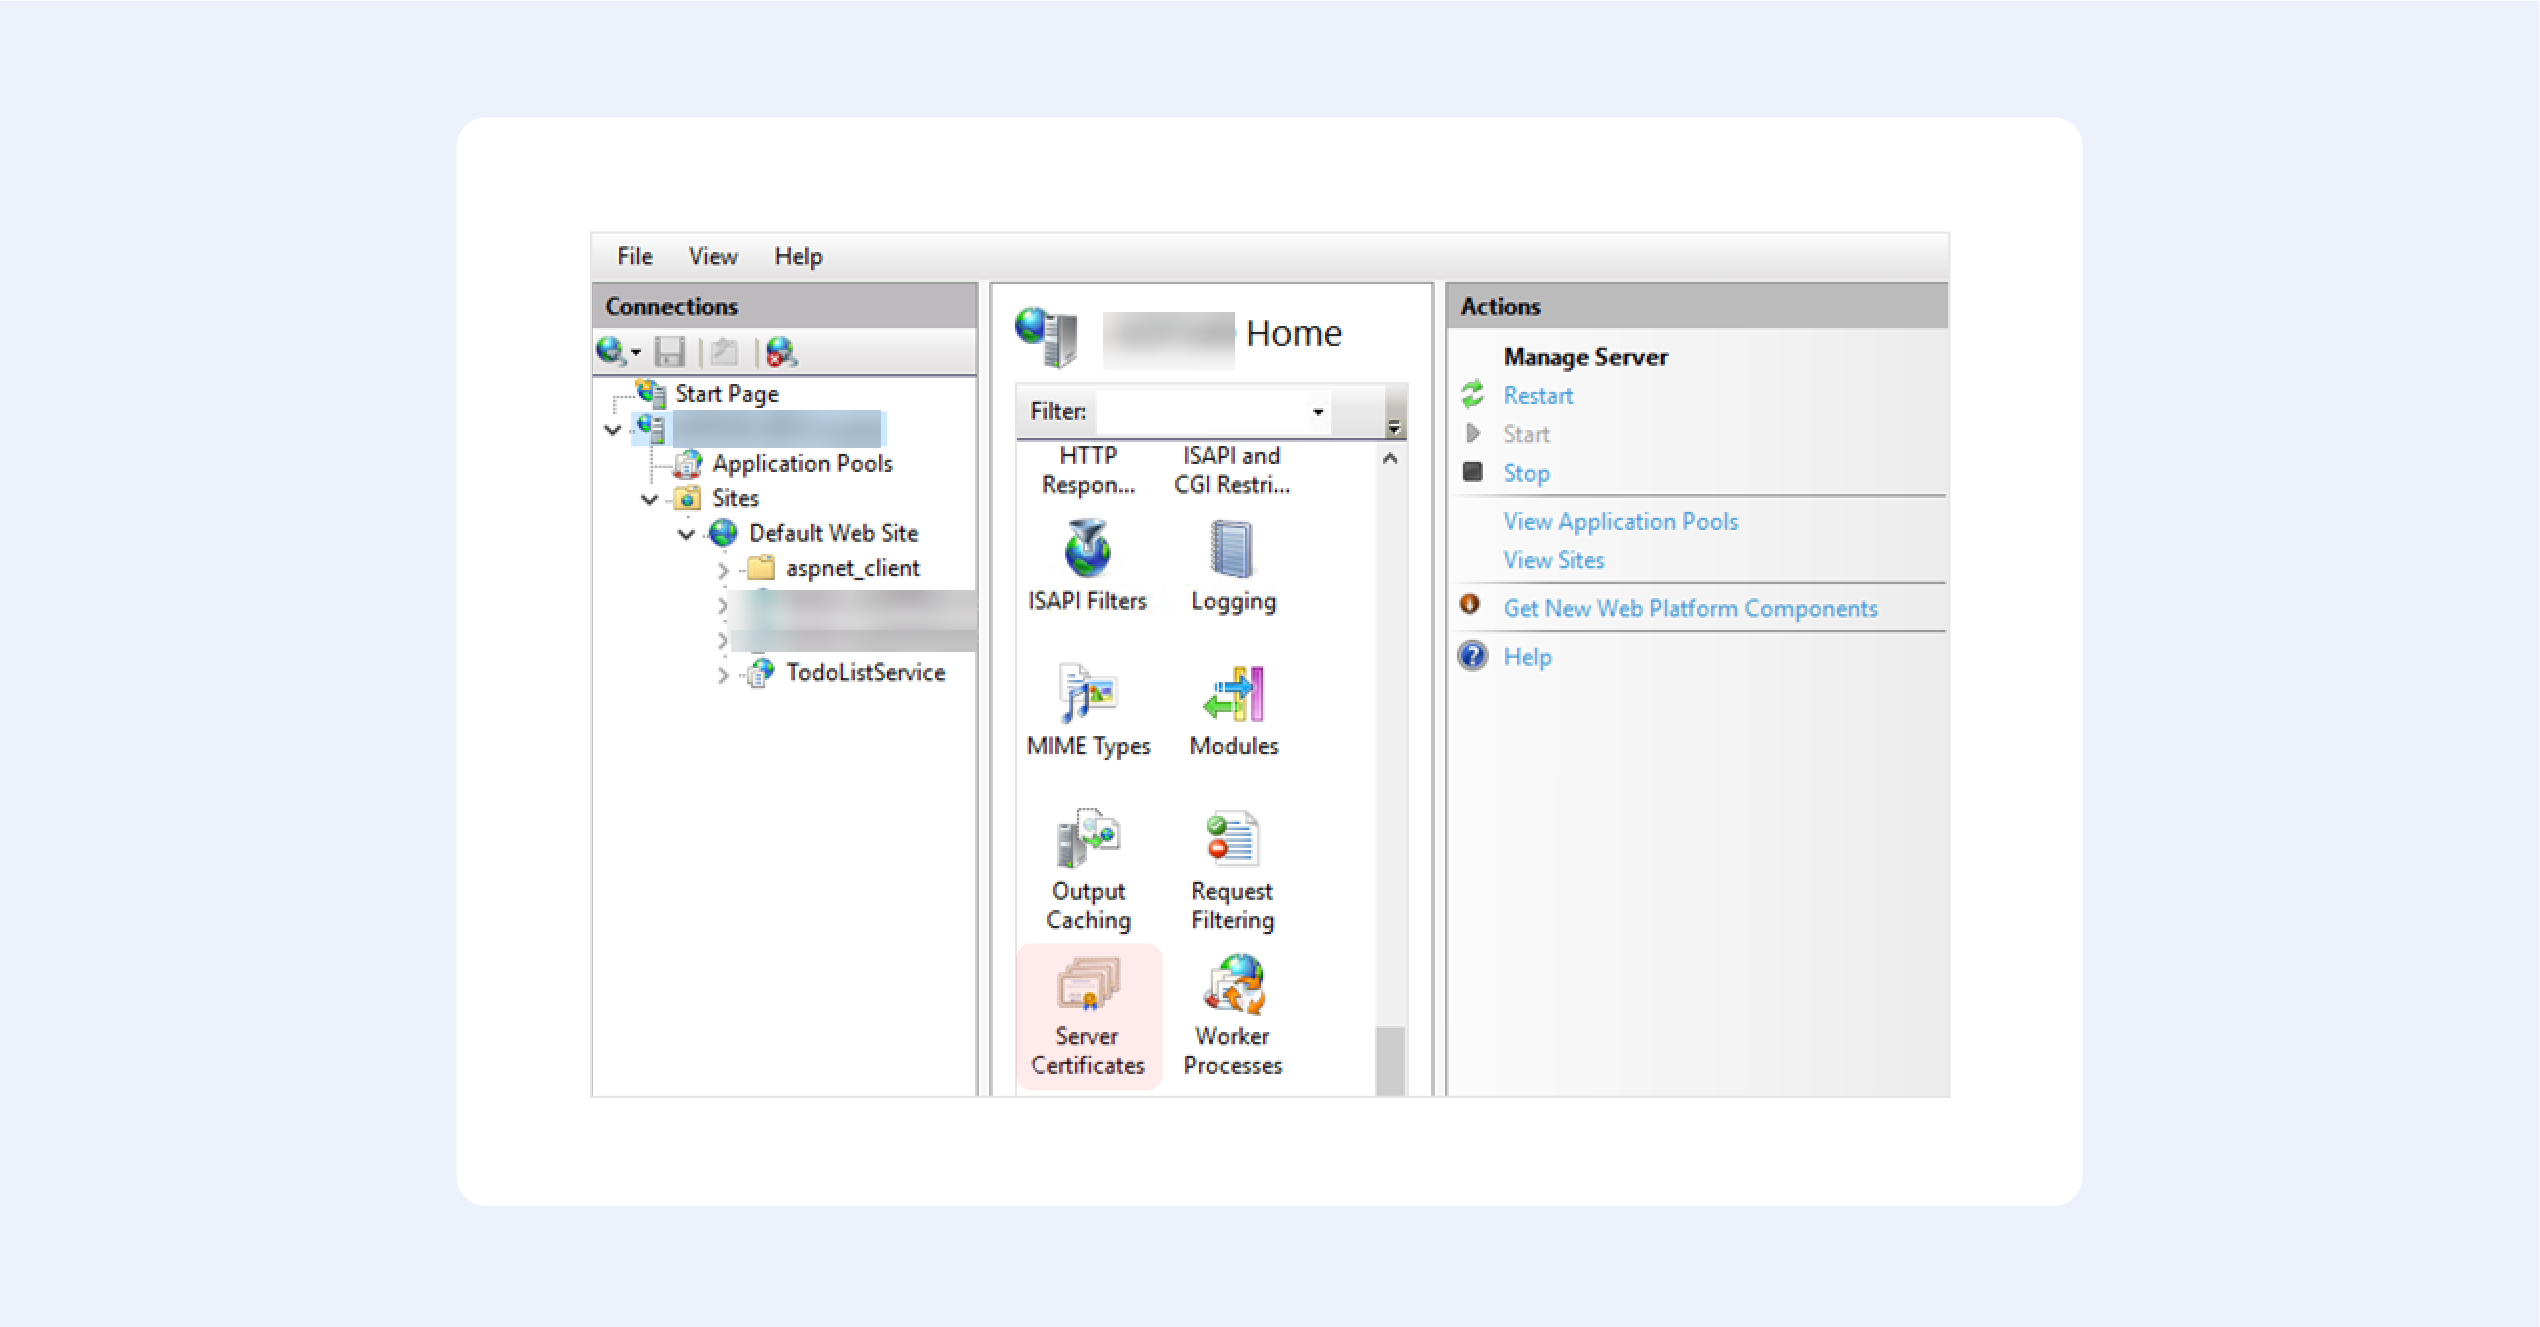
1. From the top-level in IIS Manager, select “Server Certificates”;
2. Then click the “Create” button on the right;
3. This will create a self-signed certificate, valid for a year with a private key. It will only work for “localhost”.
We hope this fruit bowl of options provides you with some choice in the matter. Creating your own self-signed certificate nowadays is trivial, but only until you begin to understand how they really work.
Our option of choice is, of course, OpenSSL — after all, it is an industry-standard.
